
 Pin it
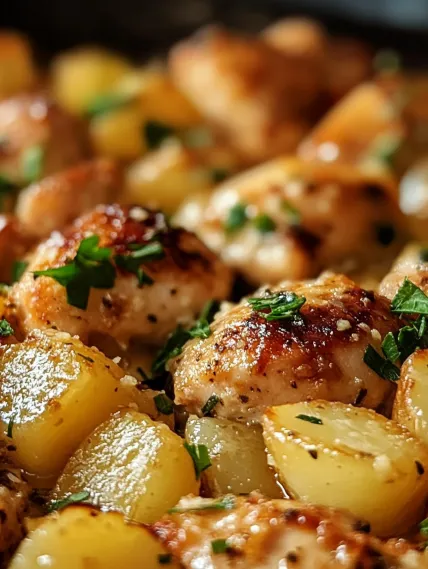
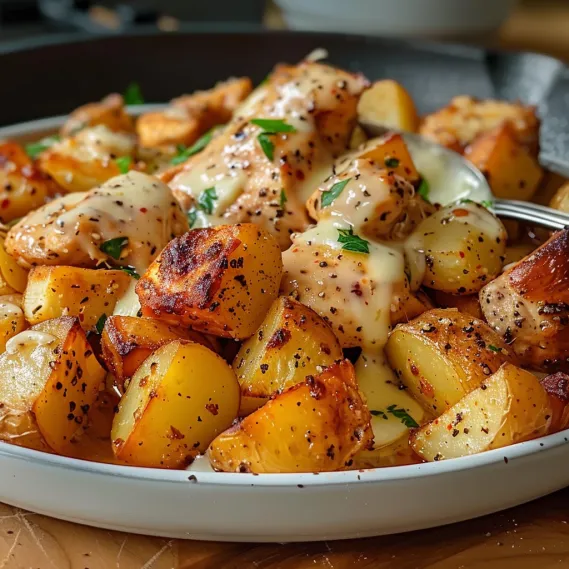
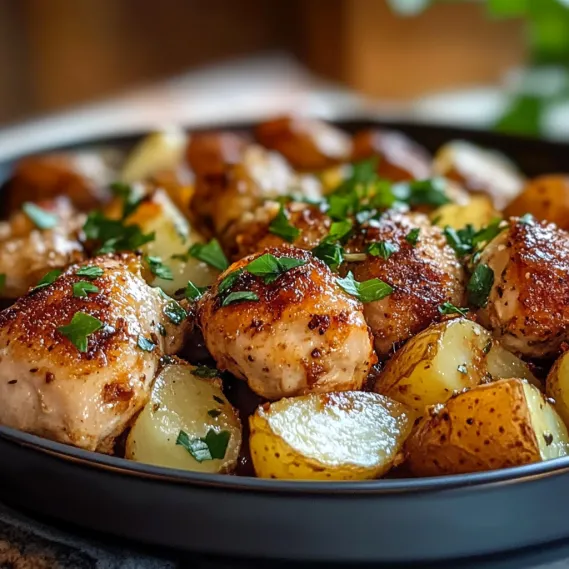
Crunchy, juicy, and bursting with intense garlic Parmesan goodness, this chicken and potatoes combo brings true home-cooked bliss in every mouthful. The tender chicken gets a tasty cheese and herb coating, while the small potatoes bake to perfection right beside it, drinking up all those yummy flavors. This all-in-one dish needs barely any cleanup and makes a fancy-looking meal with surprisingly little work.
I whipped this up the first time when my in-laws dropped by for dinner without much warning. I was worried about trying something new, but the mix of well-known flavors and the wonderful smell while it cooked had everyone excited before they even saw it. My father-in-law, who hardly ever talks about food, wanted the instructions before we'd even had dessert. It's now our must-make whenever they stop by.
Key Components and Smart Selection Advice
- Chicken Breasts: Pick ones that look about the same size so they'll cook evenly. If they're super thick, you might want to butterfly them or pound them flat.
- Baby Potatoes: Tiny red or gold ones work great. Cut them in half the same way so they finish cooking when your chicken does.
- Parmesan Cheese: Grab a block and grate it yourself for the tastiest results. The pre-shredded stuff has additives that mess with how it melts.
- Garlic: Go with fresh cloves for way more flavor than the bottled kind. Chop them tiny so the taste spreads everywhere.
- Olive Oil: Pick a nice extra virgin type for better taste and because it can handle higher heat.
I've tried loads of different potatoes and found that little Yukon Golds give you the perfect mix of soft insides and crispy outsides. Their buttery taste works magic with the garlic-Parmesan coating and turns the whole dish into something really special.
Step-by-Step Cooking Guide
- Step 1: Get Your Oven and Tray Ready
- Turn your oven to 400°F (200°C) and put parchment paper on a big baking sheet. The paper stops food from sticking and makes cleanup super easy. Make sure your oven's fully hot before you put any food in - a nice hot oven helps make that golden outside without drying out your chicken.
- Step 2: Fix Up the Potatoes
- Grab a big mixing bowl and throw in your halved baby potatoes with 1 tablespoon olive oil, 2 chopped garlic cloves, and 1/2 cup freshly grated Parmesan cheese. Sprinkle in 1/4 teaspoon salt and 1/4 teaspoon fresh ground black pepper, then mix everything until all potatoes look coated. The oil helps the cheese and seasonings stick while making them brown better. Put the potatoes on one side of your baking sheet, cut-side down so they get extra crispy.
- Step 3: Fix Up the Chicken
- Use that same bowl (don't bother washing it), put in your chicken breasts and add the other 2 tablespoons olive oil and 2 chopped garlic cloves. Sprinkle with 1 teaspoon Italian seasoning, 1 teaspoon smoked paprika, 1/2 cup Parmesan cheese, and the rest of your salt and pepper. Use your hands to rub the seasonings all over the chicken, making sure each piece gets fully covered. The oil works like a quick marinade, letting the flavors sink into the meat while keeping it juicy during cooking.
- Step 4: Set Up and Bake
- Put the chicken on the baking sheet next to the potatoes, leaving some room between each piece so air can move around them. Don't pack things too close or they'll steam instead of roast. Stick the baking sheet on the middle rack of your hot oven and cook for 25-30 minutes. How long exactly depends on how thick your chicken is - grab a meat thermometer and check for 165°F (75°C) inside to make sure they're safely cooked but still juicy.
- Step 5: Let It Rest Then Serve
- When done, take the baking sheet out and let everything sit for about 5 minutes. This waiting time lets the juices inside the chicken spread back through the meat, making it more tender. Throw some fresh chopped parsley on top for color and fresh taste. Serve right from the baking sheet for a casual look, or move everything to a nice serving plate if you want to look fancy.
 Pin it
I figured out how important spacing things properly is after making this the first time with everything crammed too close together. The second time, I spread everything out on the baking sheet, and wow, what a difference in texture! The potatoes got this beautiful golden crust, and the chicken cooked more evenly. My kids, who usually just pick at their dinner, cleaned their plates and wanted more.
 Pin it
Ideal Solution for Busy Evenings
This one-pan wonder has saved me so many times when I've come home tired with hungry family waiting. What's great is how simple it is - I can get it ready and in the oven in under 10 minutes, giving me time to help with homework or just relax while dinner cooks by itself. Having protein and starch in one pan means I just need to throw together a quick salad or steam some veggies for a complete meal. My neighbor, who works crazy long hospital shifts, asked for the instructions after I brought some over during a rough week, and now she calls it her 'life-saving dinner' for hectic nights.
Meal Prep Superstar
While the classic garlic Parmesan mix never gets old, I've come up with several twists to keep this dish in our regular lineup without getting boring. For a Mediterranean feel, I add lemon zest to the chicken coating and toss in halved cherry tomatoes and olives for the last 10 minutes of cooking. My husband loves when I swap the Italian seasoning for herbs de Provence and drizzle honey on top before serving. For my spice-loving teenager, I mix in red pepper flakes and a touch of cayenne. The basic method stays the same, but these easy swaps create totally different flavor profiles that make it seem like a brand new dish each time.
Tasty Variations That Beat Boredom
This flexible main course welcomes whatever produce is in season. Summer brings chances to add fresh corn on the cob or zucchini. Fall calls for roasted butternut squash or mushrooms. Winter versions work great with hearty root veggies. Spring welcomes tender asparagus tips and fresh peas. These changes keep meals interesting all year while using what's fresh and cheap at your store.
Prep Ahead and Freezer Tricks
For busy families, this dish really shines as a make-ahead option. You can prep the pasta and sauce up to three days early and keep it in the fridge. For storing longer, the completely finished dish freezes really well for up to three months. When you're ready to cook, thaw overnight in your fridge before baking as directed, adding just 1-2 minutes to the cooking time.
Top Cook's Secrets
- For more flavor, splash some white wine in the pan before adding chicken broth
- Get an extra crunchy top by putting the skillet under the broiler for 1-2 minutes after adding cheese
- Want it spicier? Throw in a chopped jalapeño with the Romano peppers
- Got leftover rotisserie chicken? Use it instead of ground beef for something equally tasty
- Make it a complete one-dish meal by tossing in a handful of baby spinach during the last minute of cooking
I found these little tweaks after making this dish many times - especially adding white wine, which brings amazing depth to the flavor without anyone being able to tell it's wine.
This go-with-anything tuna noodle casserole has become my trusted standby when I need a filling meal everyone likes. The mix of soft pasta, creamy sauce, and crunchy potato chips creates something that feels fancy while being surprisingly easy to make.
 Pin it
This tuna noodle casserole shows that sometimes the most unforgettable meals come from treating simple ingredients with basic techniques that let their natural goodness really stand out.
Frequently Asked Questions
- → Can I swap chicken breasts for thighs?
- Totally! Boneless, skinless thighs work great and might even be juicier. Just keep them cooking a few minutes longer to hit 165°F inside.
- → What if I can't find baby potatoes?
- Just cut regular potatoes into small chunks—about an inch thick works great. Red, gold, or russet ones are all fine as long as they cook evenly with the chicken.
- → How do I check if the chicken's done?
- A meat thermometer is the best bet—165°F is what you're aiming for. No thermometer? Cut into the thickest part, and if it's all white with no pink, you're good!
- → Can I make this ahead for meal prep?
- For sure! Store it in airtight containers in the fridge for 3-4 days. Reheat in the oven at 350°F or use the microwave for a quick warm-up.
- → What sides go best with this?
- It's already hearty, but a green veggie like roasted asparagus, sautéed beans, steamed broccoli, or a fresh salad pairs nicely without extra effort.