
 Pin it
These Mini Vanilla Pound Cakes blend luxury with coziness in perfect single servings. Each little gem offers that rich buttery goodness of old-fashioned pound cake in an elegant personal portion. The soft vanilla-speckled texture topped with bright raspberry glaze makes a dessert that feels familiar yet exciting - just right for enjoying with a loved one or giving yourself a moment of pure pleasure.
When I first made these for my family gathering, my aunt was shocked they weren't bought from a fancy bakery. What's my trick? I spend extra time on the butter-sugar mixing stage and use both vanilla extract and real vanilla bean seeds.
Key Ingredients and Shopping Advice
- Butter - Grab unsalted, premium butter with 82% fat or higher. You'll taste it in every mouthful
- Sour Cream - Don't even think about low-fat here. The full-fat version is what makes these cakes so tender and moist
- Vanilla Bean - Go for fat, moist pods. Those tiny black specks make your cake look beautiful and taste amazing
- Eggs - Make sure they're fresh and left out to reach room temperature for better mixing and rising
I've found that how you measure flour can make or break these cakes. I always use the spoon-and-level method - just scoop it into the measuring cup and smooth it off without pressing down.
 Pin it
Step-by-Step Guide
- Getting Ready
- 1. Put your oven rack right in the middle and warm it up to 325°F. This lower temp helps everything bake evenly. Meanwhile, thoroughly butter your mini Bundt pan, getting into all those little grooves.
- Mixing the Base
- 2. Your butter needs to be soft enough to dent when you push it but not melty. Beat it with both sugars until it looks super fluffy and light, for about 3-4 minutes. Don't cut this short - it's crucial for the right texture.
- Creating Your Mix
- 3. Drop in eggs one by one, mixing well each time. If it looks a bit separated, don't worry - that's normal. Remember to scrape the bowl sides often so everything mixes properly.
- Adding Wet Stuff
- 4. Stir in the sour cream and vanilla just until they're mixed in. Then add your carefully measured flour mix in three batches. Your finished batter should be thick and rich, kind of like soft ice cream.
- Baking Time
- 5. Fill each cake spot about 2/3 full so they have space to grow. Gently tap the pan on your counter to get rid of air bubbles. Bake them for 20-25 minutes, until a toothpick stuck in comes out mostly clean with just a few wet crumbs.
I just figured out that if you put strips of parchment paper under each cake before adding the glaze, cleanup becomes super easy. It's these small tricks that make baking more fun.
Handling Tiny Treats
Mini Bundt pans need special care. You want to fill every space with the same amount of batter so they all cook the same way. I've started using an ice cream scoop to make sure each one gets exactly the same amount - it works amazingly for keeping portions even.
 Pin it
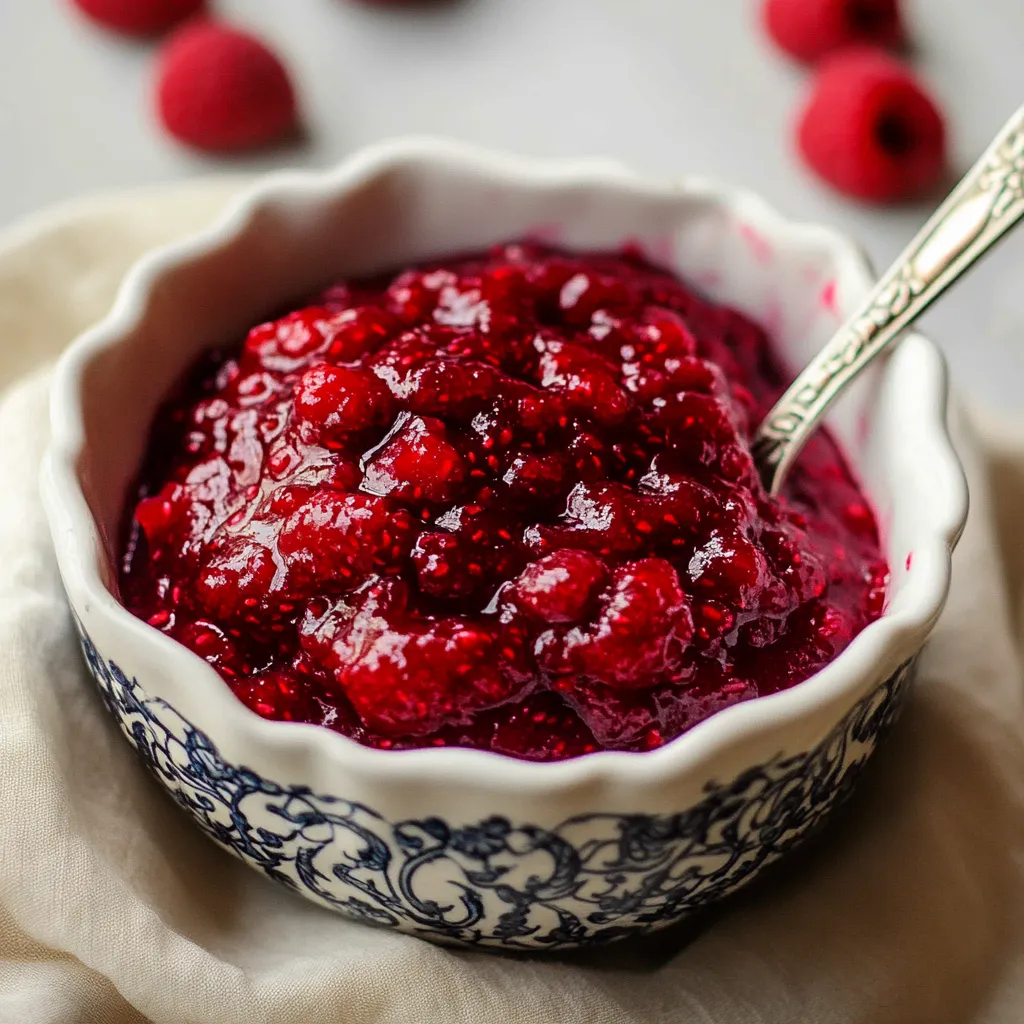
Creating Beautiful Glaze
Making that perfect raspberry topping takes some time. Start with fresh berries, push the juice through a strainer to remove seeds, and slowly mix in powdered sugar. You want it to be like warmed honey - thick enough to stick but runny enough to flow nicely down the sides.
Make-Ahead Options
These little cakes actually taste better after sitting for a day as the flavors blend together. Keep them covered at room temperature for up to 3 days, or freeze them without glaze for up to 3 months.
Temperature Timing Facts
Getting these mini cakes just right means paying attention to temperature throughout the process. Using room temperature ingredients isn't just a suggestion - it's actually chemistry at work. Cold eggs or butter can make your batter separate, ruining the smooth mixture we're trying to create. Even your kitchen's temperature matters. On colder days, I've noticed the butter and sugar need an extra minute or two of beating to get properly fluffy. For baking, I always heat my oven for at least 20 minutes beforehand to make sure it's evenly hot all the way through, which stops some parts of the cake from cooking faster than others.
Choosing Your Baking Pans
While mini Bundt pans work best for these cakes, the type of pan you use really changes how they turn out. Darker metal pans brown the outside faster, so I turn down the heat by 25°F when using them. Lighter pans give you a gentler crust but might need a few more minutes in the oven. After trying countless batches, I've found that well-used Nordic Ware pans give the clearest designs, though any good mini Bundt pan works great if you prep it right. My go-to trick is mixing melted butter with flour and brushing it into every corner of the pan. This might seem like extra work, but it's saved so many cakes from sticking, especially with those tricky Bundt shapes.
Pro Baking Secrets
- Check if they're done about 5 minutes early - all ovens heat differently
- Let them sit in the pan for exactly 10 minutes before turning them out onto a cooling rack
- When using vanilla beans, cut them open and scrape with the knife back to get all the tiny seeds out
 Pin it
Closing Thoughts
After years of baking these little treasures, I've learned that taking your time is the real secret to pound cake success. There's something truly special about taking these golden beauties out of the oven, each one a perfect single serving that combines comfort and elegance.
Frequently Asked Questions
- → Can I prepare this beforehand?
- Absolutely, you can make parts separately and the cake freezes nicely
- → What's the purpose of coffee?
- It enhances chocolate intensity without adding coffee taste
- → Are frozen raspberries okay to use?
- Sure, they work great in the filling - use them straight from freezer
- → Why need ingredients at room temp?
- This helps everything mix properly for the best cake texture
- → Is a smaller version possible?
- Definitely, we've included details for making a 6-inch cake