
 Pin it
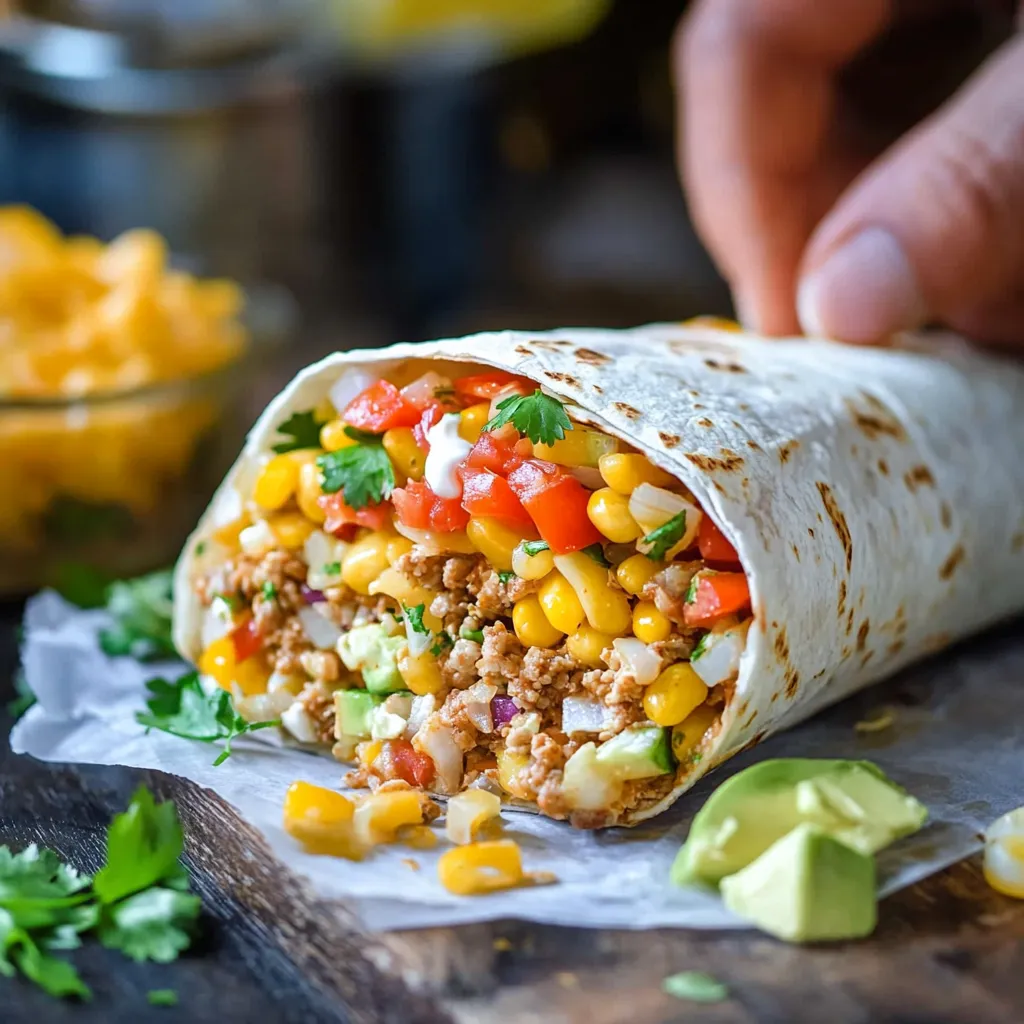
Turn everyday staples into delicious beef burritos with this crowd-pleasing method. The well-seasoned ground beef pairs wonderfully with crisp veggies and gooey cheese, making a filling meal that's adaptable and totally mouthwatering.
My kids beg for these burritos every week - they're simply fantastic. The DIY spice mix really makes them stand out.
Key Ingredients
- Ground beef (80/20): This fat ratio keeps the meat juicy and tasty
- Fresh garlic and onion: Forms the tasty background notes
- Spice blend: Each component brings its own flavor boost
- Large tortillas: New ones are easier to work with
- Black beans: Boosts protein and adds fiber
- Fresh vegetables: Gives that needed texture contrast
Step-by-Step Cooking Guide
- Step 1:
- Begin with a sizeable, thick-bottomed pan over medium heat. Pour in oil and let it get hot. Toss in diced onions and cook them until see-through and sweet-smelling, around 5-7 minutes. This creates your taste foundation.
- Step 2:
- Throw in minced garlic, stirring all the time for half a minute until you can smell it but before it browns. Using fresh garlic really makes it better.
- Step 3:
- Turn heat up to medium-high. Add your beef, breaking it into small, similar chunks. You want them small enough to eat easily but not tiny. Cook until completely brown, 8-10 minutes.
- Step 4:
- Pour off extra fat if there's too much. Add all spices while the meat's still hot - this wakes up the flavors. Mix well so everything's evenly coated.
- Step 5:
- Add water and tomato paste. Let it bubble gently until it thickens a bit but stays moist, about 5-7 minutes. The meat should be wet but not swimming.
 Pin it
Complete Assembly Instructions
- Step 1:
- Heat each tortilla in a dry pan for 20-30 seconds on both sides until soft. This stops them from cracking.
- Step 2:
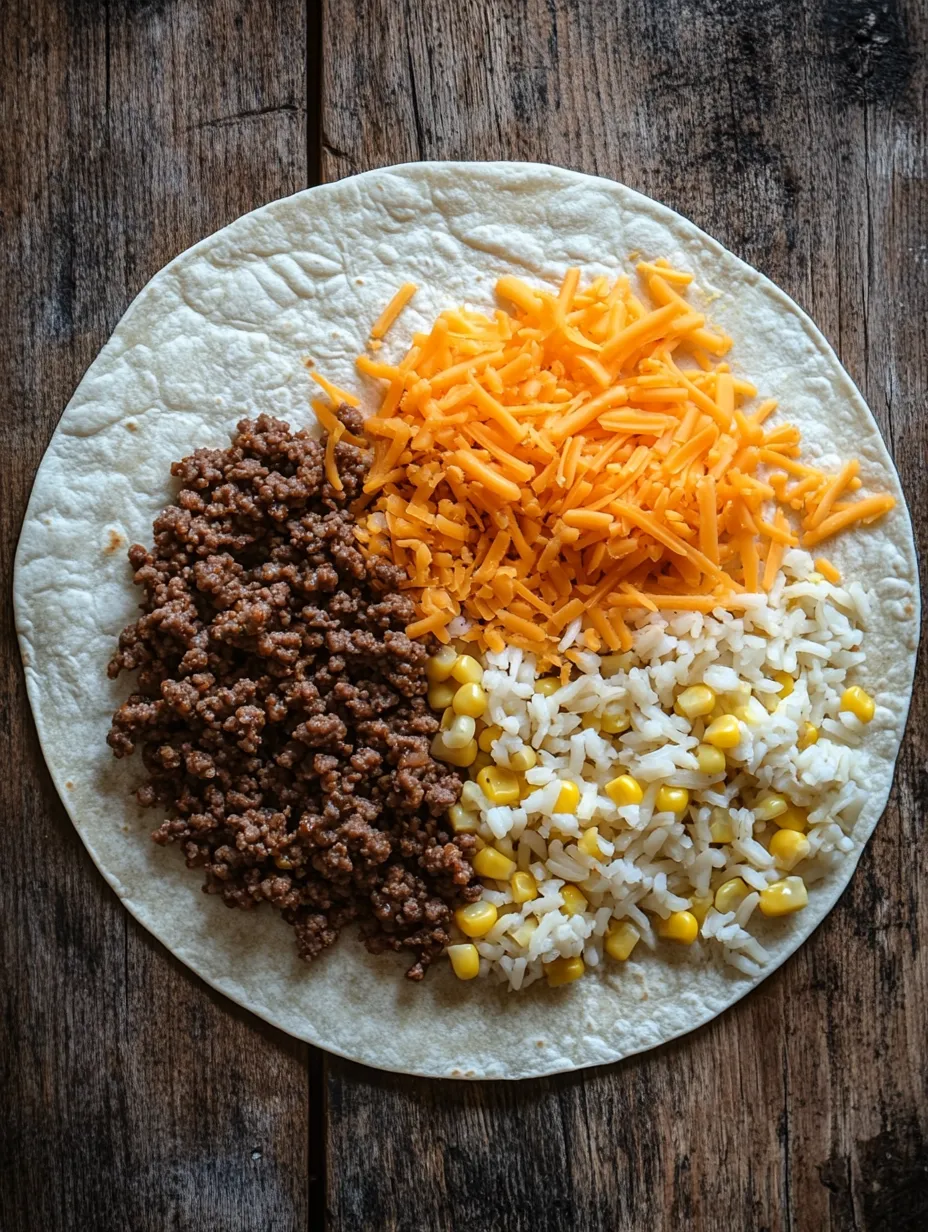
- Lay tortilla flat and put ingredients slightly off-center. First add warm rice (about 1/3 cup). The rice helps block moisture.
- Step 3:
- Put beef (1/3 cup), then beans, corn, cabbage, tomato, onion, and cheese in tidy lines. Keep total filling around 1 cup.
- Step 4:
- Fold in the sides first, then pull the bottom over the filling. Hold edges while rolling upward, keeping it snug but not squished.
- Step 5:
- Brown the wrapped burrito with the seam facing down until golden, about 2-3 minutes per side.
After making these countless times, I've found that getting rid of extra grease and layering things the right way really matters.
Smart Cooking Tricks
 Pin it
Want amazing burritos? First, heat your tortillas - they'll bend without breaking. Brown your finished burritos in a dry pan for that crispy outside. Use cheese that's not cold from the fridge so it melts better. Keep your fillings about an inch from the edges to avoid spills. Try this trick: dry your beans with paper towels before adding them - no more soggy wraps. Brush a tiny bit of oil on the outside before cooking for that restaurant crunch. Don't forget to add salt and pepper to each layer, not just the meat. When rolling, tuck the sides in first, then roll from bottom to top, making it tight but not squeezing too hard.
Freezing and Warming Up
Make sure your burritos are totally cool before freezing - this stops ice from forming and making them mushy. Wrap each one in foil first, then plastic wrap to really block freezer burn. When you want to eat them, thaw in the fridge overnight - never leave them out on the counter. To warm up, take off all wrapping and either microwave for a soft burrito or heat in a 350°F oven for a crunchy outside. If using the oven, add a little oil on top first. They're also great in a panini press for extra crunch. They'll taste just as good for up to three months in the freezer.
Keeping Things Fresh
 Pin it
Ready-made burritos will stay fresh in your fridge for about 3 days when wrapped tight in foil or kept in sealed containers. For best results, keep your ready ingredients apart - cooked beef stays good for 4 days, cut veggies remain fresh for 3-4 days, and rice lasts up to 5 days when stored right. If you're getting meals ready ahead of time, try keeping wet stuff and dry stuff in different containers to avoid sogginess. Use tape to mark dates on everything. Store sour cream and guacamole separately until you're ready to eat. Let cold burritos sit out a bit before reheating so they warm up better.
What to Serve Alongside
Boost your burrito feast with fresh lime pieces on the side - that tangy kick really works! Make some quick guacamole using ripe avocados, chopped onions, tomatoes, and cilantro. Try a smoky cream sauce with sour cream, lime juice, and canned chipotles for amazing flavor. Fresh tomato salsa adds brightness, while hot Mexican rice makes the meal more filling. Add some shredded lettuce, diced tomatoes, and extra cheese for topping. Different hot sauces let everyone pick their own heat level.
Sharing with Friends and Family
Make mealtime fun by setting up a do-it-yourself burrito station! Arrange all ingredients in separate bowls along your table - hot meat, beans, rice, cheese, lettuce, tomatoes, onions, and sauces. Keep your tortillas warm in a towel wrapped in foil so they stay flexible. Put small signs by each ingredient. Use serving spoons and tongs for easy self-service. Add some fun touches like bright bowls and some flowers. Smart tip: put ingredients in the order they should go in - this helps prevent overfilling and makes rolling much easier!
 Pin it
Planning Ahead Tips
Cut down on weekday cooking time by planning smart. Cook big batches of rice and beans on the weekend - they heat up great later. Cut all your veggies the day before and keep them in containers with paper towels to soak up moisture. Mix a large amount of spice blend and store in a sealed jar. Brown several pounds of meat at once and divide it for multiple meals. Keep everything separate until you're ready to make burritos. Mark all containers with dates. This way, you can throw together fresh burritos any busy night!
Tasty Side Dishes
Grilled corn with mayo, chili powder, lime, and cheese makes an awesome side dish. A quick mix of black beans and corn with red onions and cilantro adds freshness. Try making lime-flavored rice as an extra filling option. Whip up green salsa by blending tomatillos, jalapeños, onion, and cilantro for some tang. A simple cabbage mix with lime dressing gives nice crunch. Don't forget to try Mexican-style pickled veggies for some zing. A basic avocado and tomato mix works great too!
Mistakes to Watch For
Don't pack those tortillas too full - you'll have a hard time rolling them! Always warm your tortillas first; cold ones just break. Don't roll too loosely or everything will fall out. Dry wet ingredients with paper towels to keep things crisp. Avoid using cold fillings straight from the fridge - they won't heat up right. Make sure to add salt to each part, not just the meat. Take your time when rolling. Keep filling away from edges for clean folding. Go easy on wet toppings like sour cream or guacamole.
More Helpful Hints
Always dry those veggies before adding them - wet ingredients make sad burritos! Add salt to each component as you go for better taste throughout. Skip the pre-packaged shredded cheese and grate your own - it melts way better and tastes fresher. Let your cooked meat sit for 5 minutes before using it to keep juices from making things soggy. Heat tortillas in small batches to keep your assembly line moving. If you're using avocado, mix it with lime juice to stop browning. Cook the finished burrito in a dry pan for extra crunch. Keep a wet cloth nearby for quick cleanup.
Money-Saving Tricks
Look for meat when it's on sale and buy extra - divide and freeze for later. Cook dried beans instead of using canned ones - they're cheaper and taste better! Mix your own taco spices instead of buying packets - keep in a jar for months. Buy vegetables that are in season for better prices and taste. Get cheese in blocks and grate it yourself - costs less and melts better. Look at local Mexican stores for cheaper tortillas. Make large amounts of rice and freeze in portions. Grow herbs like cilantro and oregano at home. Stock up on pantry stuff during sales.
Final Kitchen Wisdom
Spending a bit more on good tortillas is totally worth it - they can make or break your burrito. Fresh stuff really does matter, especially for veggies and herbs. Practice your rolling technique - tight but not crushing. Keep everything lined up for smooth assembly. Take your time - great burritos can't be rushed. Trust what your taste buds tell you about seasoning. Remember, homemade always beats takeout. Pass these tips to friends - good food gets better when shared!
Frequently Asked Questions
- → Can these be frozen?
- Absolutely! Wrap each one in foil, then freeze. Cook straight from frozen at 350°F for 45-55 minutes.
- → Can I swap the beans?
- Sure, black beans work great. Make sure to rinse and drain them first.
- → How long can they stay in the fridge?
- Uncooked burritos last about 3-4 days chilled. Add 5-10 extra minutes to baking when cooking them.
- → How do I reheat leftovers?
- Wrap in foil and heat at 350°F. It usually takes 25-35 minutes, depending on how cold they are.
- → Can I throw in extra veggies?
- Go for it! Add fresh options like tomatoes, onions, or some avocado. Just avoid freezing these toppings.