
 Pin it
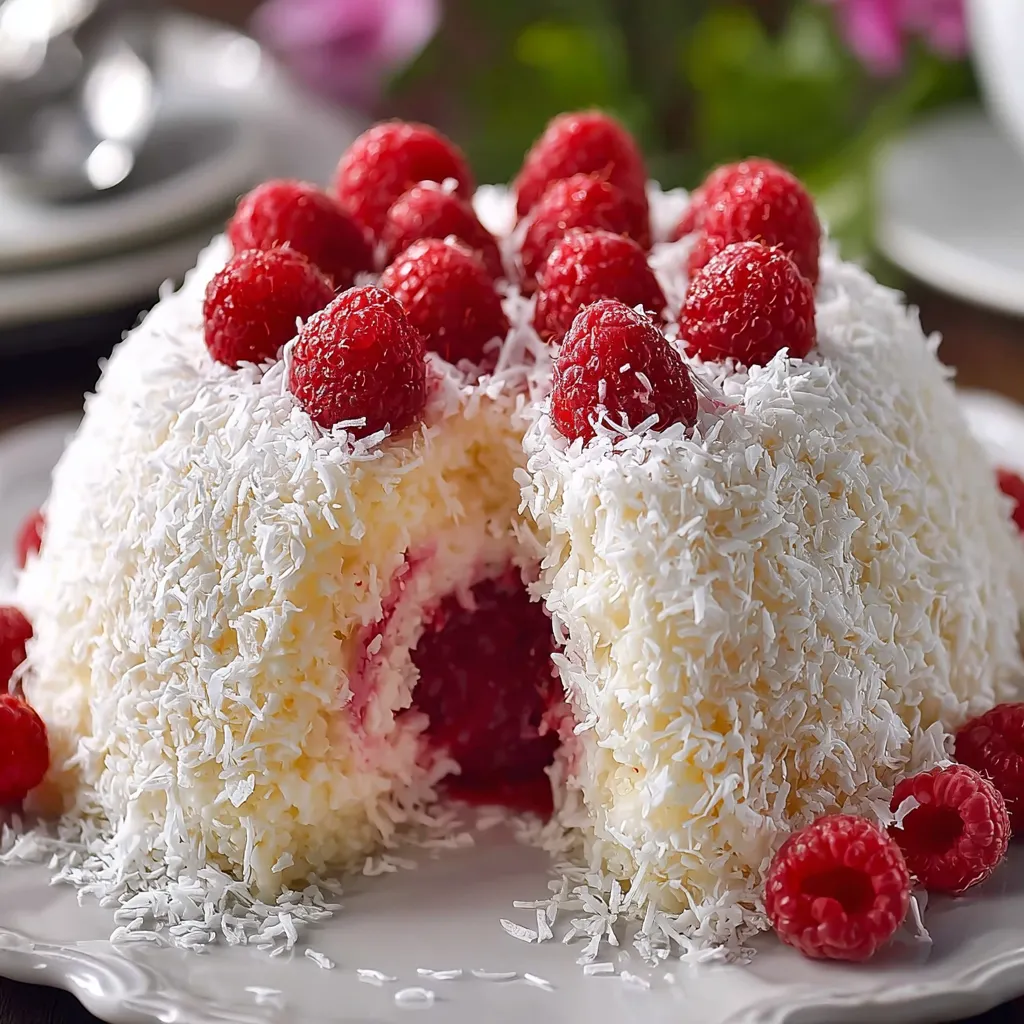
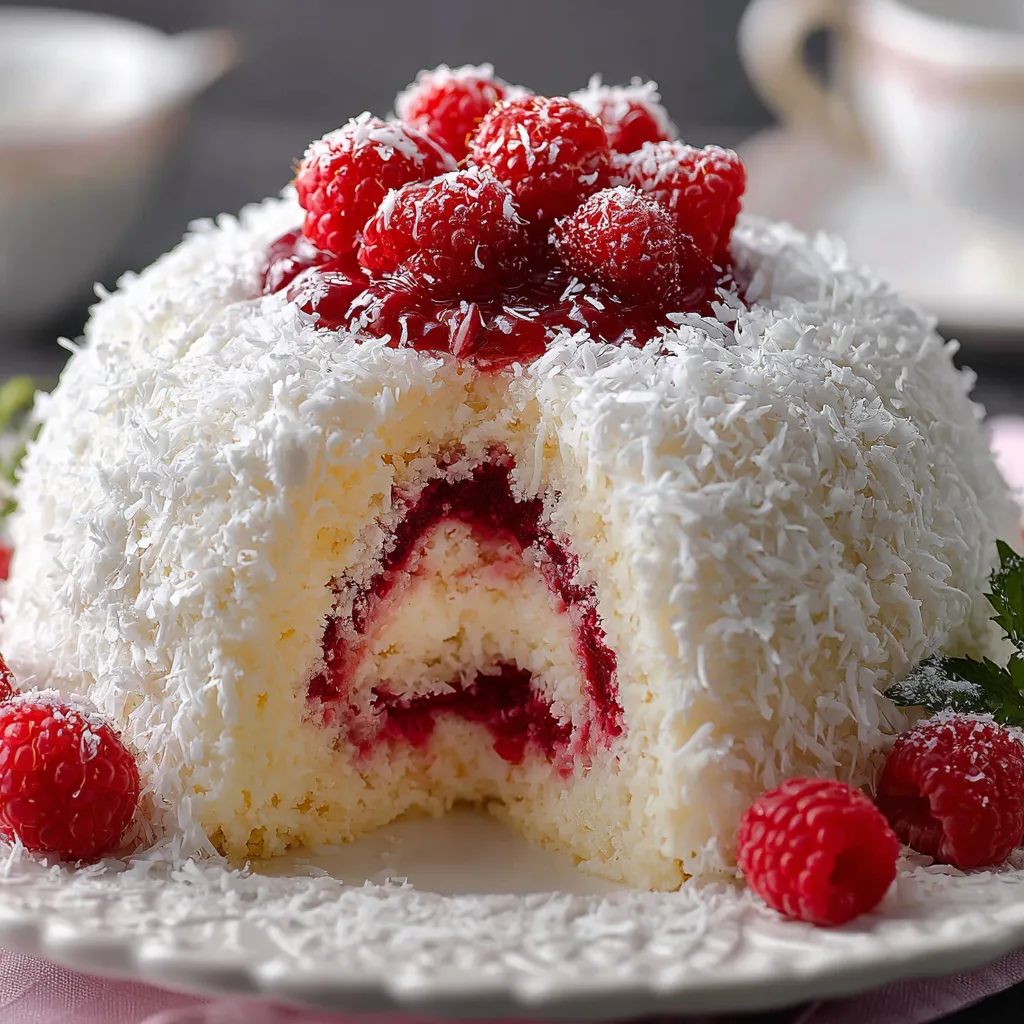
Snowball cake turns any gathering into a celebration with its tender vanilla crumb, bright raspberry swirl, and snowy coconut finish. This nostalgia-packed dessert is perfect when you want both a showstopper and a family-friendly treat. I love how striking and playful it looks on the table—it always draws excited oohs from all ages.
I baked this snowball cake for my daughter's birthday one year and it became our new tradition Each time I add a different preserve twist or try new coconut brands to find the softest flakes
Ingredients
- All-purpose flour: gives structure to the cake and produces a soft crumb Choose a reputable brand for best texture
- Baking powder: lifts the cake so it bakes up fluffy and tall Make sure yours is less than six months old for the best rise
- Salt: brings out all the flavors A fine sea salt disperses evenly in batters
- Unsalted butter: provides rich flavor and a moist texture You want it at room temperature for creaming
- Granulated sugar: sweetens and helps the cake become light during the creaming process Look for fine crystal sugar which blends smoothest
- Eggs: add richness and hold the cake together Room temp eggs give better volume
- Vanilla extract: is the flavor backbone of this cake Real vanilla gives the most beautiful depth so use pure if you can
- Whole milk: ensures the cake stays soft and tender Fresh is best—avoid UHT for richer taste
- Raspberry preserves: create the iconic swirl Use a preserve that's thick not runny and warm slightly for easy swirling
- Sweetened shredded coconut: is your snow effect Find long-cut soft coconut flakes for best sticking power and fluffy texture
- Powdered sugar (optional): for dusting Always sift for a pretty finish and no lumps
Step-by-Step Instructions
- Prep the Pan:
- Grease your 10-cup dome pan or a heatproof mixing bowl very well Then dust with flour Tap out the excess so the surface is just lightly coated This is crucial for easy unmolding
- Mix Dry Ingredients:
- In a roomy bowl whisk together the flour baking powder and salt Whisking ensures they blend smoothly and that you won't get clumps of baking powder later
- Cream Butter and Sugar:
- Using a mixer beat the butter and sugar together on medium speed until pale and fluffy This step should take at least 3 to 4 minutes Creaming incorporates air which means a lighter crumb
- Add Eggs and Vanilla:
- Add eggs one at a time beating each in fully before adding the next Stir in vanilla extract Mix just until combined Overmixing can make the cake dense
- Combine Wet and Dry Mixtures:
- Add half the flour mix to the butter mixture then half the milk Gently mix until just combined Repeat with the remaining flour and milk This gentle alternation gives the best texture and prevents overworking the flour
- Layer and Swirl Preserves:
- Pour half the batter into your prepared pan Drop spoonfuls of raspberry preserves over that Gently cover with the rest of the batter then use a thin knife or skewer to create a few swirls You want ribbons of jam but not fully mixed in
- Bake:
- Place the pan on the center rack and bake for 45 to 55 minutes A toothpick should come out clean or with just a few moist crumbs Let it cool in the pan for 10 minutes
- Unmold and Cool:
- Carefully invert the cake onto a wire rack and let it cool completely Do not rush this warm cake can break easily
- Coat with Coconut:
- If the cake seems dry lightly brush the surface with water simple syrup or jam for best adherence Press coconut gently all over until fully covered
- Powdered Sugar Finish:
- Optional for extra snow effect Sift a little powdered sugar over the cake right before serving
 Pin it
I always look forward to tasting the crust where the preserves caramelize against the pan That corner slice vanishes first at our house My kids also love sneaking handfuls of coconut while we decorate—the kitchen always smells like vanilla and berries
Storage Tips
Wrap the cooled and coconut-coated cake tightly in plastic wrap before storing in an airtight container It keeps well at room temperature for up to two days For longer storage refrigerate it but allow the cake to come back to room temperature for best flavor and softness The coconut coating holds up best if added the day you plan to serve
Ingredient Substitutions
You can use strawberry or blackberry preserves instead of raspberry as long as they are thick and not watery If you need a dairy-free option try substituting coconut milk for whole milk and dairy-free butter in the batter For an extra snowy effect mix unsweetened coconut flakes with the sweetened kind
Serving Suggestions
Snowball cake stuns at birthday parties baby showers or holidays Try topping each slice with fresh raspberries or a dollop of softly whipped cream Make it into a festive centerpiece by placing it on a footed cake stand and sprinkling extra coconut around the base Little kids love mini snowball cupcakes too use muffin tins and shorten baking time
Cultural and Historical Context
The snowball cake has roots in classic American and British baking where coconut covered desserts evoke nostalgia for winter holidays The dome shape has been around for more than a century in various forms—think Charlotte russe or classic bombe cakes This modern version borrows that dramatic presentation but with easy homemade touches
 Pin it
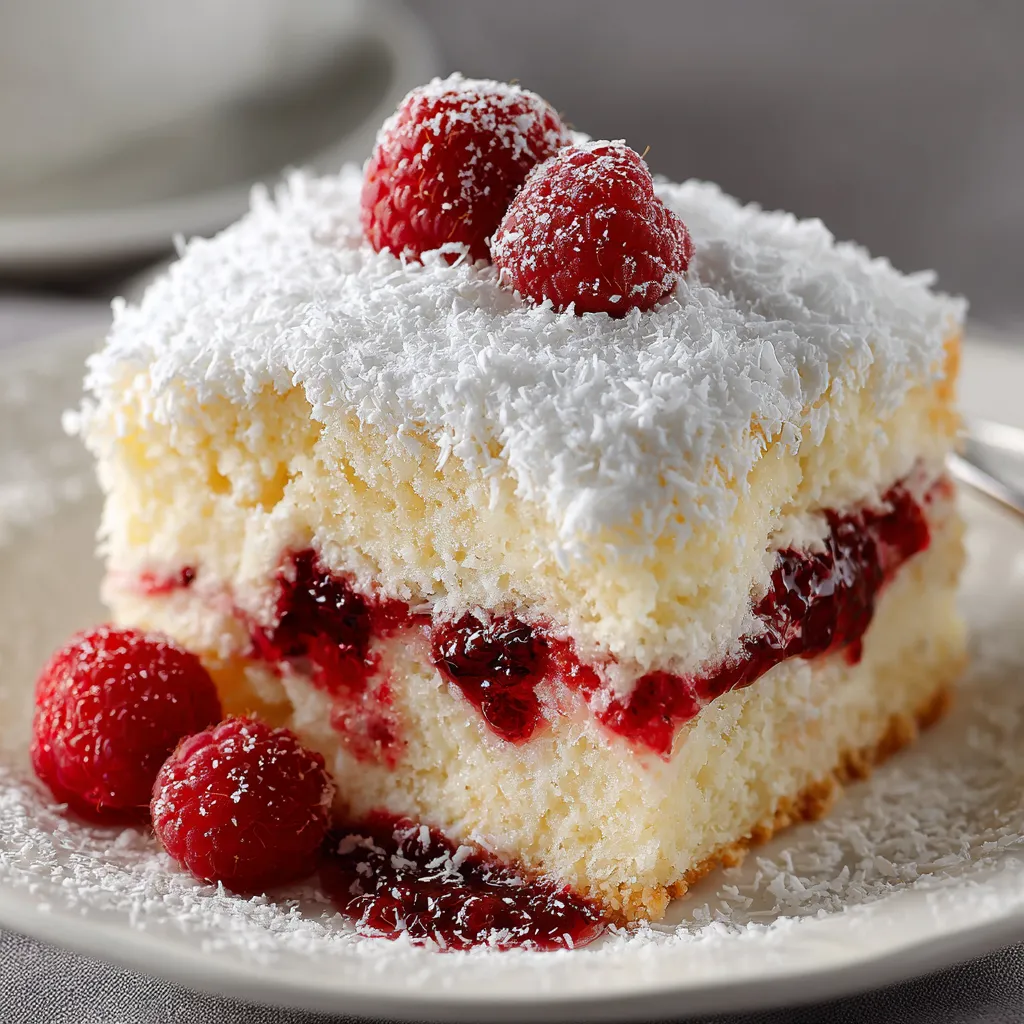
Serve this cake as a showpiece for your next celebration and enjoy how every slice reveals bright swirls and fluffy coconut layers. It's a memory-maker that's both nostalgic and impressive.
Frequently Asked Questions
- → How do I get a perfect dome shape?
Use a well-greased, 10-cup dome cake pan or oven-safe bowl. Dust with flour to help release the cake easily after baking.
- → Can I use a different preserve for the swirl?
Yes, strawberry or blackberry preserves also work well, offering unique flavor twists while keeping the cake moist.
- → What’s the best way to coat cake with coconut?
After cooling, lightly brush the surface with water or syrup so the shredded coconut adheres evenly for a snowy effect.
- → Is it necessary to add powdered sugar on top?
No, powdered sugar is optional but adds an extra touch of sweetness and a lovely, snowy finish to the presentation.
- → Can this dessert be made a day ahead?
Absolutely. Prepare and coat the cake the day before, cover, and store at room temperature for best flavor and texture.