Tasty Strawberry Filled Chocolates

Featured in: Indulge in Heavenly Sweet Treats

These Strawberry Filled Chocolates turn three basic items into candy shop-quality sweets. Grabbing ready-made frosting and chocolate creates a quick path to making treats that taste professionally done. They're special because they feel like pricey candy shop goodies while being super easy to make at home. The mix of strawberry white chocolate inside and chocolate coating outside hits the perfect flavor balance. They work great as gifts or when you want to impress folks without messing with tricky steps or hard-to-find stuff.
Lily chef cooking Cookingwithmee blog.
Updated on Thu, 10 Apr 2025 14:44:33 GMT
Strawberry Cream Chocolates Pin it
Strawberry Cream Chocolates | cookingwithmee.com

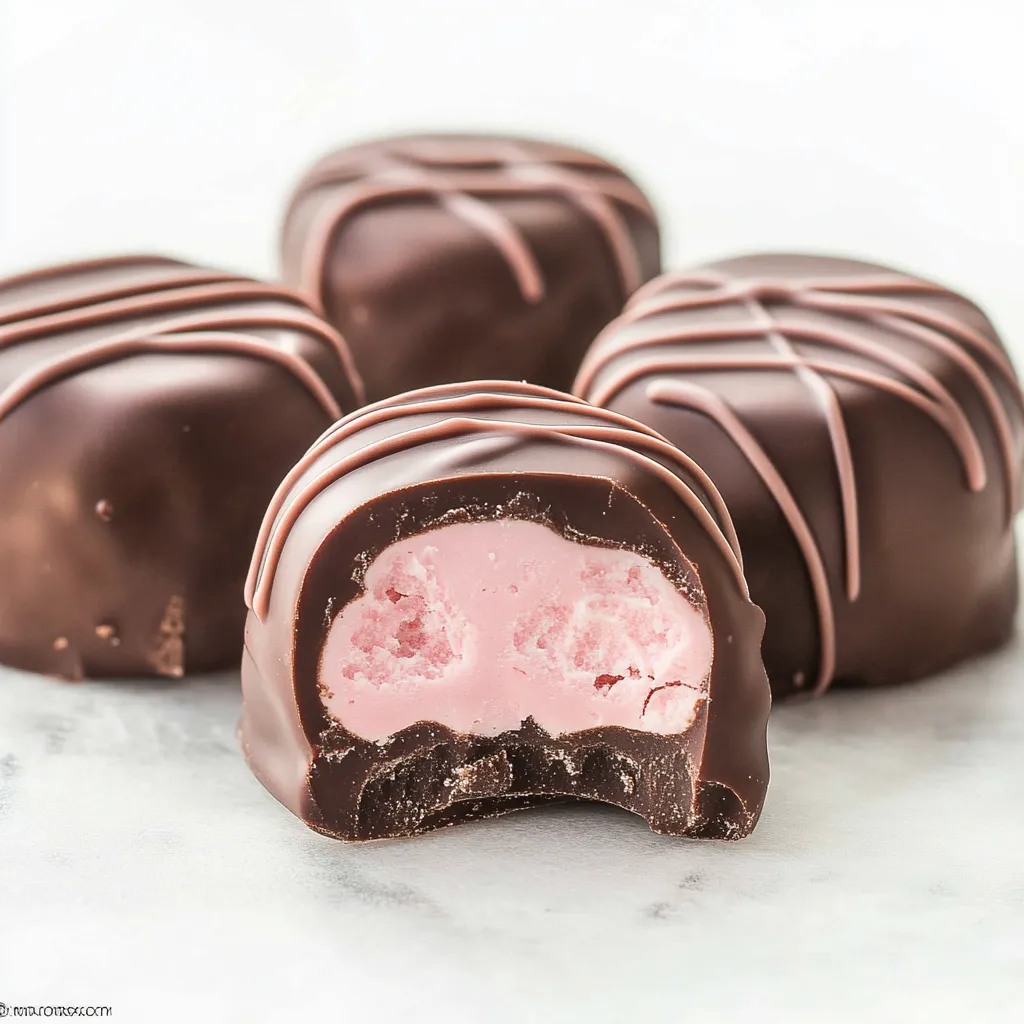
Turn basic ingredients into fancy, homemade chocolates that look just like store-bought treats. These strawberry cream-filled chocolates need just three things but give amazing results while being super easy to whip up. They're great for presents or when you want something special.

After making chocolates for many years, I've found that getting the chocolate melted right and watching the temperature are the real secrets to success.

Key Ingredients

  • High-End Chocolate: Go for melting wafers when dipping
  • Strawberry Frosting: One 16 oz container, bought or made yourself
  • White Chocolate: 12 oz chunk for the inside and topping
  • Parchment Paper: To cover your trays
  • Fun Add-ons: Maybe some sprinkles or colored sugar

Step-by-Step Guide

1. Making Your Filling:
Put parchment in a 9x9 inch pan with edges hanging over by 2 inches. Melt your white chocolate using a bowl over simmering water. The bowl shouldn't touch the water. Keep stirring until it's all smooth. Mix it with your strawberry frosting until everything blends well. Spread this mix flat in your lined pan. Cool it in the fridge for 30 minutes until you can cut it.
2. Getting Chocolate Ready:
Melt your dipping chocolate using another clean bowl over water or try 30-second zaps in the microwave, giving it a stir each time. If you go the microwave route, use half power. Your chocolate should look shiny and smooth, around 90°F.
3. Coating Each Piece:
Cut your chilled filling into small 1-inch blocks. Use a fork to dunk each block into your melted chocolate. Tap the fork gently on the bowl to let extra chocolate drop off. Place them on a sheet covered with parchment.
4. Making Them Pretty:
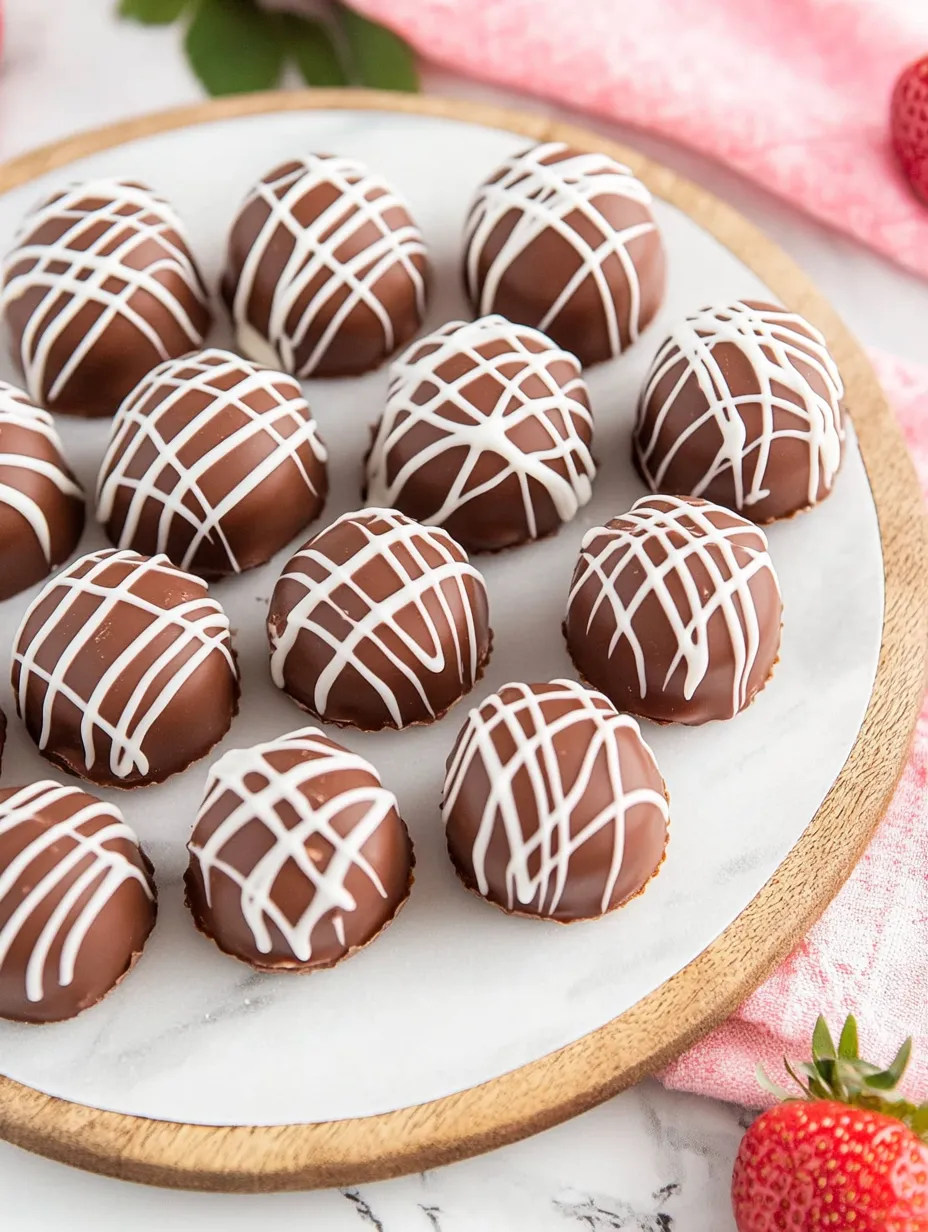
While the chocolate's still wet, make patterns with your fork or drizzle different colored chocolate on top. If you're using sprinkles, add them now before the chocolate hardens. Let them set at room temp or pop in the fridge for 15 minutes.
5. Finishing and Keeping:
Wait until they're completely solid before touching them. Store them with parchment between layers in a sealed container. They'll stay good at room temperature for two weeks or in the fridge for a month.
Strawberry Cream Chocolates Recipe Pin it
Strawberry Cream Chocolates Recipe | cookingwithmee.com

Smart Storage Ideas

Keep your chocolates in single rows with parchment paper between each layer in a sealed container. They'll stay fresh at room temp for up to two weeks, or in the fridge for a month. If you chill them, let them warm up before eating so they taste and feel their best.

Great Companions

  • Some fresh strawberries
  • A nice cup of coffee
  • Bubbly for special times
  • A mug of hot cocoa
  • Some afternoon tea
  • Pretty boxes for giving away
Easy Strawberry Cream Chocolates Recipe Pin it
Easy Strawberry Cream Chocolates Recipe | cookingwithmee.com

Tasty Twists

  • Try raspberry frosting with dark chocolate
  • Mix vanilla frosting with some mint flavor
  • Pair orange frosting with dark chocolate
  • Combine lemon frosting with white chocolate
  • Use coffee frosting with milk chocolate
Strawberry Cream Chocolates Dessert Pin it
Strawberry Cream Chocolates Dessert | cookingwithmee.com

These DIY chocolates show that you can make fancy candy at home with just a handful of ingredients and some careful steps. Whether you give them away or munch on them yourself, they'll wow everyone with their bakery-worthy look and fantastic flavor.

Frequently Asked Questions

→ Can I try other frosting flavors?
Absolutely, play around with any canned frosting you like to make different types.
→ What's the best way to keep these chocolates?
Pop them in an airtight box at room temp and they'll stay good for up to 2 weeks.
→ Is it okay to use chocolate melting discs?
For sure, candy melts or chocolate discs work wonderfully and might be simpler to handle.
→ Why should I tap the fork after dipping?
It gets rid of extra chocolate and stops puddles from forming around your treats.
→ Can these chocolates go in the freezer?
Sure thing, stick them in an airtight container and freeze for up to 3 months.

Fruity Filled Chocolates

Easy 3-item chocolates packed with strawberry filling - they taste like they came from an expensive candy store.

Prep Time
225 Minutes
Cook Time
20 Minutes
Total Time
245 Minutes
By: Lily

Category: Decadent Desserts

Difficulty: Difficult

Cuisine: American

Yield: 40 Servings (40 caramels)

Dietary: Vegetarian, Gluten-Free

Ingredients

→ Main Components

01 1/2 cup (113g) unsalted butter
02 1/2 cup (120ml) thick cream or whipping cream (36-40% fat)
03 3 tablespoons (44ml) plain water
04 1/4 cup (60ml) clear corn syrup
05 1 cup (200g) granulated sugar

→ Final Addition

06 1/2 teaspoon chunky sea salt, such as Maldon

Instructions

Step 01

Brush a thin coat of oil on a 9×5-inch loaf pan. Cut a piece of parchment with hanging edges, oil it too, then place inside the pan.

Step 02

Chop butter into 8 chunks, put in a microwave-safe container with thick cream. Heat until they're melted and warm; set aside for later.

Step 03

Pour water and corn syrup into a small pot. Pour in sugar carefully without getting any on the sides. Lightly mix just enough to dampen all the sugar.

Step 04

Put the mix on medium heat until bubbling starts. Pop the lid on for a minute so steam helps wash down any sugar crystals stuck on the sides.

Step 05

Take the lid off, stick in a candy thermometer, and cook until it hits 320°F (160°C) with light amber edges forming. Slowly pour about one-sixth of your warm butter-cream mix into the sugar, stirring with the thermometer base. Keep adding small amounts, stirring between each pour.

Step 06

Your temperature will drop after adding the dairy. Keep cooking until the mix gets back to 240°F (115°C), which takes about 5-10 minutes.

Step 07

Carefully tip the hot caramel into your waiting pan. Let it sit for roughly 20 minutes, then scatter the sea salt on top. Wait until it's totally cool, about 3 ½ hours.

Step 08

Take the caramel out of the pan. If it feels too sticky, chill it in the fridge for 30-45 minutes. Use a big sharp knife to cut it into pieces you like. We think 1-inch by 1/2-inch blocks work well. Wrap each piece in plastic wrap or wax paper.

Notes

  1. You'll definitely need a candy thermometer to get the right softness and texture.
  2. Want softer treats? Just add 2-4 more tablespoons of cream. For harder candy, cook until you reach 245°F (118°C).

Tools You'll Need

  • 9×5-inch loaf pan
  • Parchment paper
  • Microwave-safe bowl
  • Small saucepan
  • Candy thermometer
  • Large, sharp knife

Allergy Information

Please check ingredients for potential allergens and consult a health professional if in doubt.
  • Has milk products (butter and heavy cream)

Nutrition Facts (Per Serving)

It is important to consider this information as approximate and not to use it as definitive health advice.
  • Calories: 56
  • Total Fat: 3 g
  • Total Carbohydrate: 7 g
  • Protein: ~