These Valentine's Oreo balls turn basic ingredients into fancy chocolate treats that show how much you care. You'll crush Oreos, mix them with cream cheese, shape them into small rounds, and coat them in melted chocolate. They're surprisingly simple but look store-bought. For best results, get the block-style cream cheese and chill the mix thoroughly before forming the balls. Add pink and red sprinkles, tiny hearts, or swirls of white chocolate for that Valentine's flair. They're great as gifts, party snacks, or a sweet treat with your partner, and they'll stay fresh in your fridge for up to two weeks.
Nothing beats the taste of homemade Oreo balls - they're like the perfect mix of everyday cookies with fancy truffle vibes. When you smash up Oreos, blend them with cream cheese, and coat everything in melty chocolate, you get pure magic. These little bites have become my go-to holiday treat, turning basic stuff from my pantry into goodies that make everyone smile and reach for seconds.
When I brought a batch to our family Christmas party last year, they vanished in seconds. My picky nephew, who usually won't touch anything that looks fancy, gobbled down four in one go. Want to know my trick? Don't rush the steps and splurge a bit on good chocolate for dipping.
Must-Have Ingredients and Shopping Advice
Oreo Cookies: Stick with standard Oreos instead of Double-Stuf because the normal filling amount gives you the right texture
Cream Cheese: Go for full-fat blocks at room temp only. The light stuff makes your mixture too mushy
Chocolate: Grab quality baking bars from Ghirardelli or Lindt and forget about chips as they don't melt right
Vegetable Oil: Just a bit helps your chocolate flow better for dipping
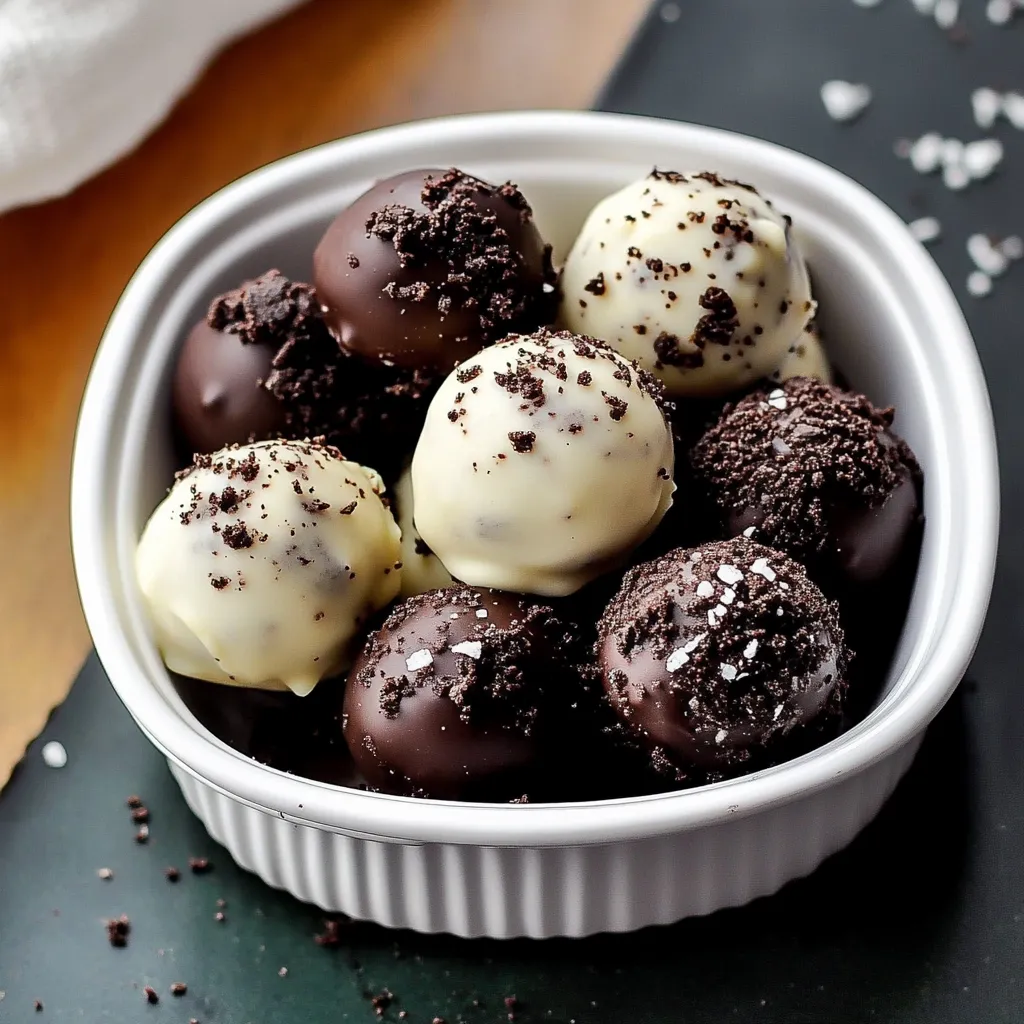
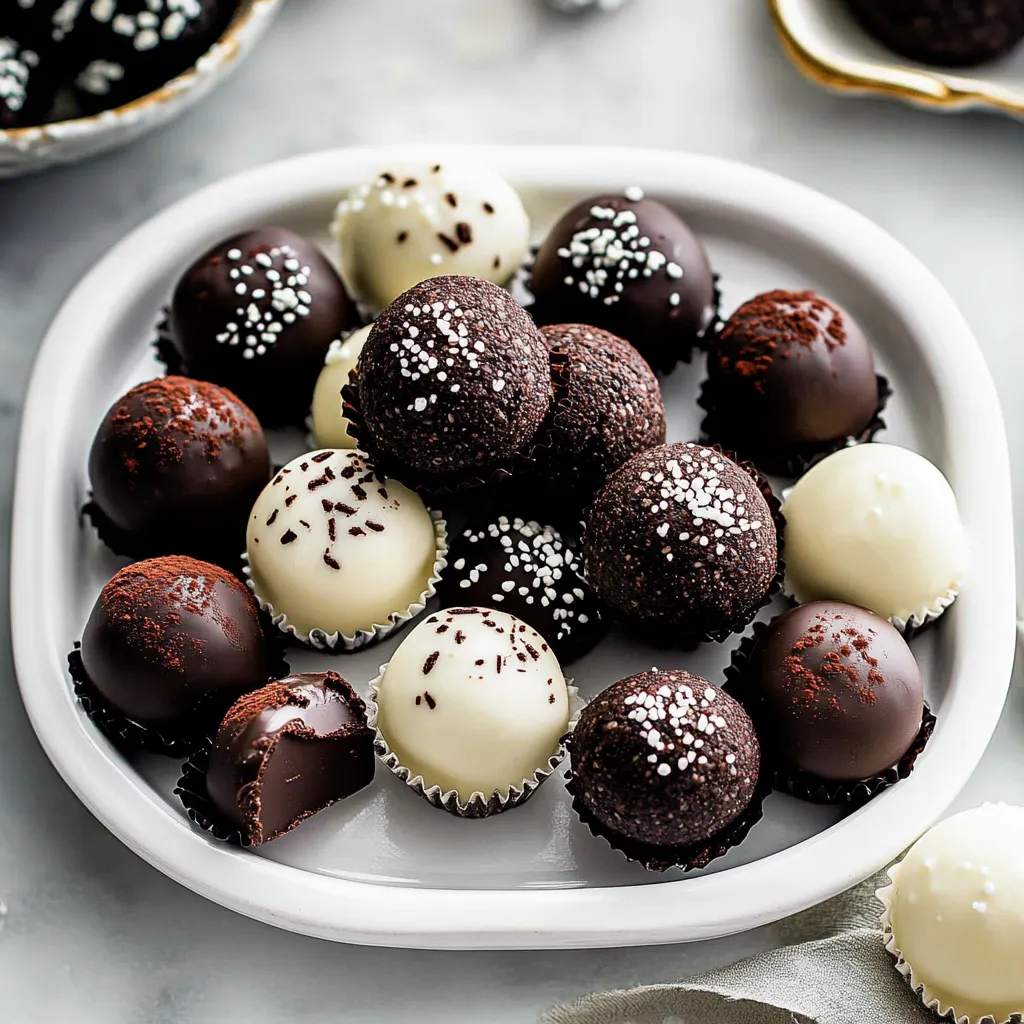
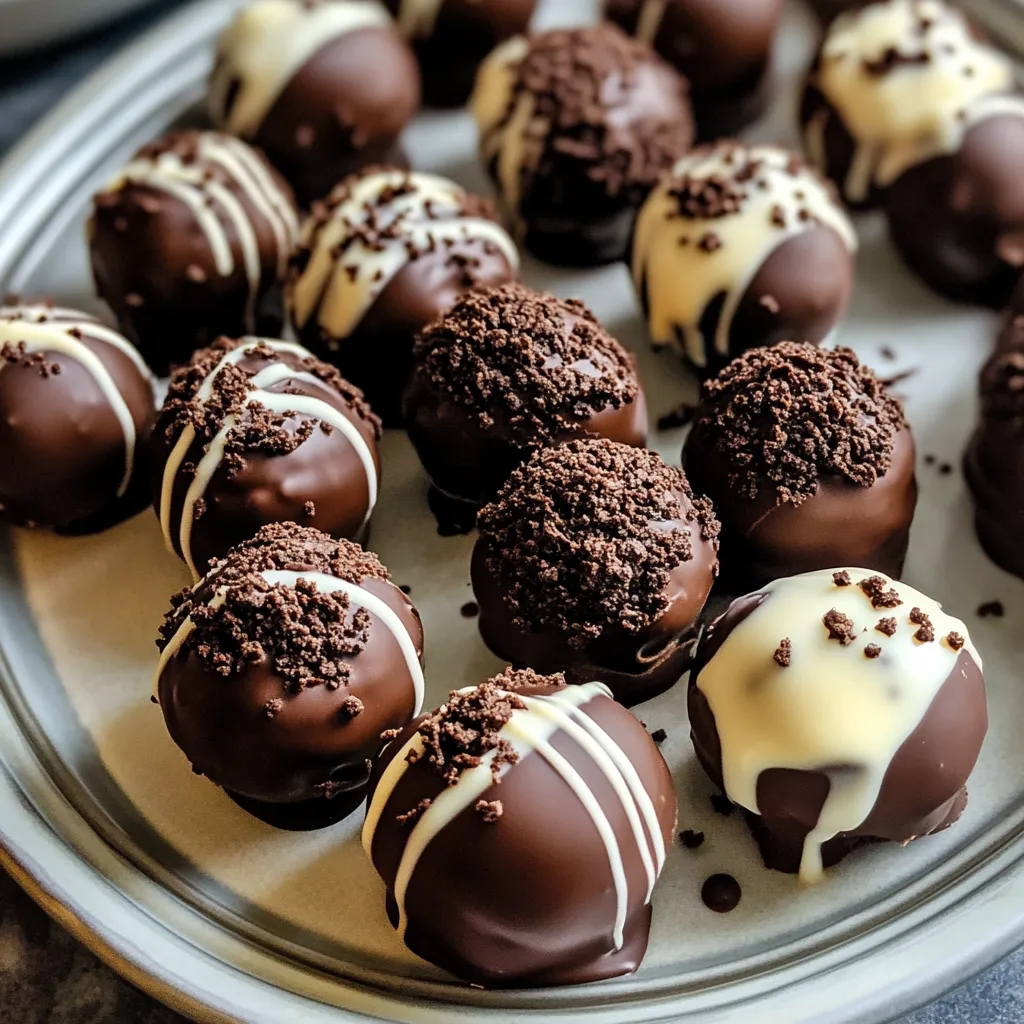
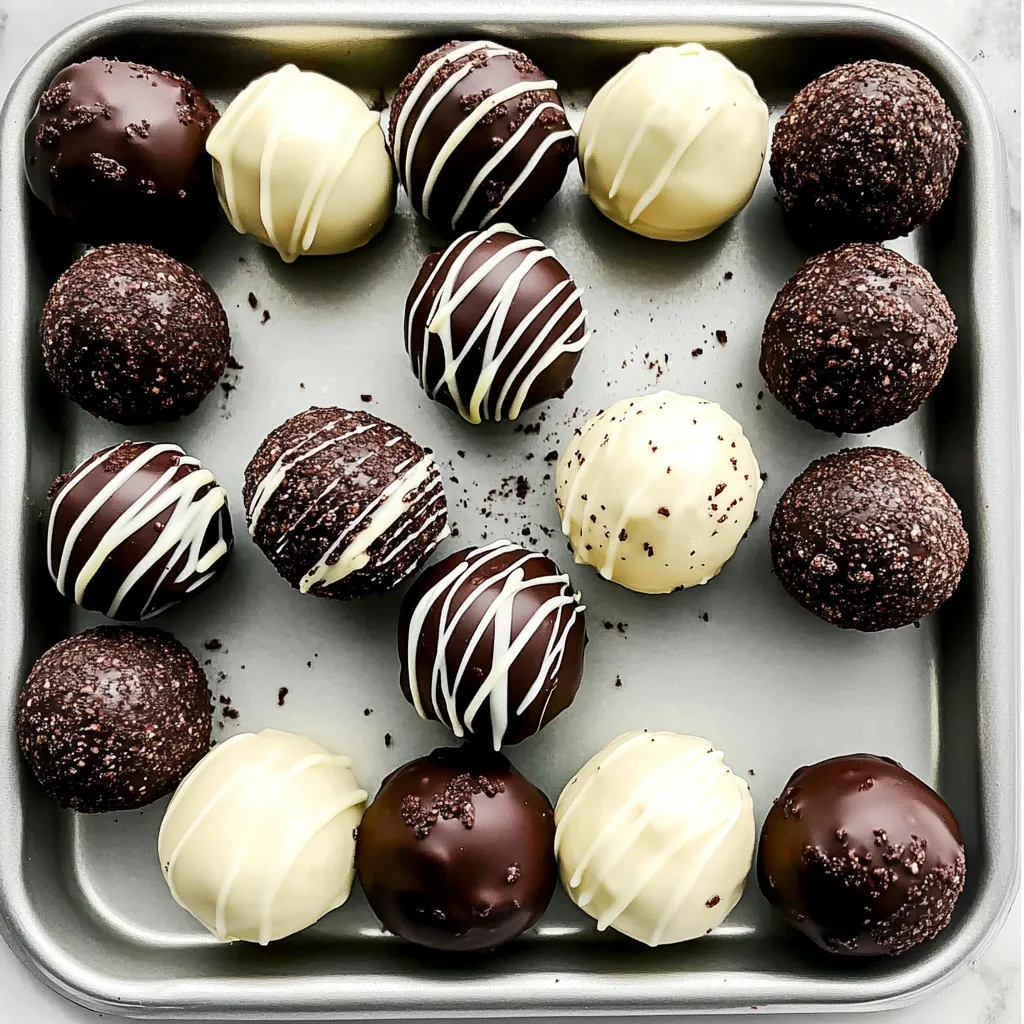
Extras for Topping: Have some sprinkles, Oreo bits, or different colored chocolate ready for decorating
Step-by-Step Guide
1. Get Everything Ready
Start by setting up your workspace with food processor ready to go, softened cream cheese waiting, and a cookie sheet lined with parchment. Make a little truffle-making station with everything you need close by. I've made these so many times now and getting organized first saves tons of headaches later.
2. Make Your Cookie Dust
Grind whole Oreos, cream filling included, into tiny crumbs in your food processor. Use quick pulses until it looks like wet, dark sand. You don't want any chunks left because smooth truffles need smooth crumbs. If you're using a rolling pin instead, double-bag those cookies so crumbs don't fly everywhere.
3. Mix It Right
Combine your soft cream cheese with all those Oreo crumbs until fully mixed. Look for an even color with no white streaks showing. The mix should feel like soft cookie spread that holds its shape but isn't too sticky. If you're using a mixer, keep scraping down the sides so everything mixes evenly.
4. Shape Your Balls
Grab a tablespoon (about 18-22g per ball) and scoop out portions of your mixture. Roll each between your hands into nice round shapes about the size of small golf balls. Take your time but keep moving. Each ball should look smooth and the same size. Put them on your prepared sheet and if they start getting too soft, stick them in the fridge for 15 minutes.
5. Prep Your Chocolate
While your balls chill for at least an hour, get your chocolate coating ready. Cut chocolate into small, same-sized pieces and add a little oil. Melt in the microwave using 20-second bursts, stirring between each. Your chocolate should look silky and shiny but not too hot. Let it cool about 5 minutes before you start dipping.
6. Dip Like a Pro
Work with just a few balls at a time, keeping the rest cold. Drop each ball into your melted chocolate. Use a fork or special dipping tool and let extra chocolate drip off. Gently tap the fork on the edge of your bowl for an even coat. Carefully place on parchment paper. If you want toppings, sprinkle them on right away before the chocolate hardens.
Pin itHow to Make Oreo Balls Truffles | cookingwithmee.com
My Oreo ball adventure started during a Christmas baking day with my friend Amy. What we thought was just a fun experiment has turned into our yearly tradition, and we try new decorating ideas every time we make them.
Mastering Your Chocolate Coating
After making countless batches, I've learned that getting the coating just right takes some patience. Your chocolate needs to flow easily but can't be so hot it melts your filling. I always keep half my balls in the fridge while working with the others so they stay firm during dipping.
Keeping Them Fresh
These treats actually taste better after sitting in the fridge for a day. Put them in layers with parchment paper between them in sealed containers, and they'll stay good for up to two weeks. Though honestly, they're usually gone way before that!
Different Flavors For Different Seasons
I switch things up all year long. For springtime, I use Golden Oreos with white chocolate coating. At Christmas, mint Oreos with dark chocolate are amazing. And for birthdays, the birthday cake Oreos make them extra festive. Each type has its own special taste but still keeps that awesome cookies-and-cream center.
Pin itHow to Make Oreo Balls Recipe | cookingwithmee.com
How To Package Them As Gifts
When I give these as presents, I put them in little paper candy cups inside pretty boxes. This makes them look like fancy store-bought chocolates instead of homemade treats. Using both white and dark chocolate coatings with different toppings creates a mix that looks as good as anything from a chocolate shop.
Working With Different Room Temperatures
The weather matters when making chocolate-dipped goodies. In summer, I keep my kitchen cool and work fast. In winter, I let the finished truffles sit at room temperature for about 5 minutes before serving to get the best texture and flavor. These little tricks help me get great results no matter what time of year it is.
Pro Tricks You Should Know
Pin itHow to Make Oreo Balls (Truffles) Recipe | cookingwithmee.com
Wipe your dipping fork clean between each ball for the smoothest finish
Keep some ice water handy to cool your hands when rolling balls
Start with just a little oil in your chocolate and add more if needed
Let your dipped truffles set up at room temp for the prettiest look
Wrapping It Up
Making awesome Oreo balls means finding that sweet spot between following the steps carefully and adding your own creative touch. Each time you make them is a chance to try something new or get better at your technique. Whether they're for a holiday party or wrapped up as gifts, these little treats never fail to make people happy.
Frequently Asked Questions
→ What makes these more Valentine's Day special?
Go with pink or red sprinkles, little heart decorations, or swirl some pink-colored white chocolate on top for that romantic touch.
→ Can I make these before Valentine's Day?
Absolutely! They stay good in the fridge for up to 2 weeks, so you can get them ready well before the big day.
→ Why can't I form the balls properly?
If the mix is too sticky, pop it in the fridge for about 15 minutes - this will make rolling them much easier.
→ What chocolate works best for coating?
Go for good quality baking chocolate bars like Baker's or Ghirardelli instead of chocolate chips for a smoother finish.
→ Is it possible to freeze these treats?
Sure thing, they freeze nicely for up to 3 months. Just let them thaw in your fridge overnight before you serve them.
Love Themed Oreo Balls
No-fuss Valentine's Oreo balls coated in rich chocolate with fun festive sprinkles - a sweet homemade gift to delight your favorite people.
0312 ounces chopped semi-sweet or white chocolate (339g)
041/2 teaspoon veggie oil or coconut oil
→ Optional Toppings
05Valentine's themed sprinkles
06Crushed Oreo bits
07Extra melted chocolate for fancy drizzles
Instructions
Step 01
Grind whole Oreos (both cookie parts and cream center) in your food processor until they're finely crushed.
Step 02
Combine the Oreo crumbs with room temp cream cheese until everything's mixed well using either a mixer or food processor.
Step 03
Grab tablespoon-sized amounts (around 18-22g each) and roll them into neat balls. Put them on a lined cookie sheet. Chill for at least 1 hour.
Step 04
Melt your chocolate chunks with oil using short 20-second bursts in the microwave, stirring after each burst. Cool it down for 5 minutes before you start dipping.
Step 05
Drop each cold ball into the melted chocolate. Gently tap to get rid of extra chocolate and place on your lined sheet. Throw on some Valentine's sprinkles while the chocolate's still wet if you want.
Step 06
Stick them back in the fridge for at least an hour until the chocolate coating gets completely firm before you eat them.
Notes
Keeps fresh in the fridge up to 2 weeks
Works with original, Golden, or Mint Creme Oreos
Only use solid block cream cheese, not the soft tub stuff
Tools You'll Need
Blender or food processor
Mixer
Cookie sheets
Baking parchment
Dipping fork or candy tool
Allergy Information
Please check ingredients for potential allergens and consult a health professional if in doubt.

 Pin it
 Pin it
 Pin it
 Pin it