
 Pin it
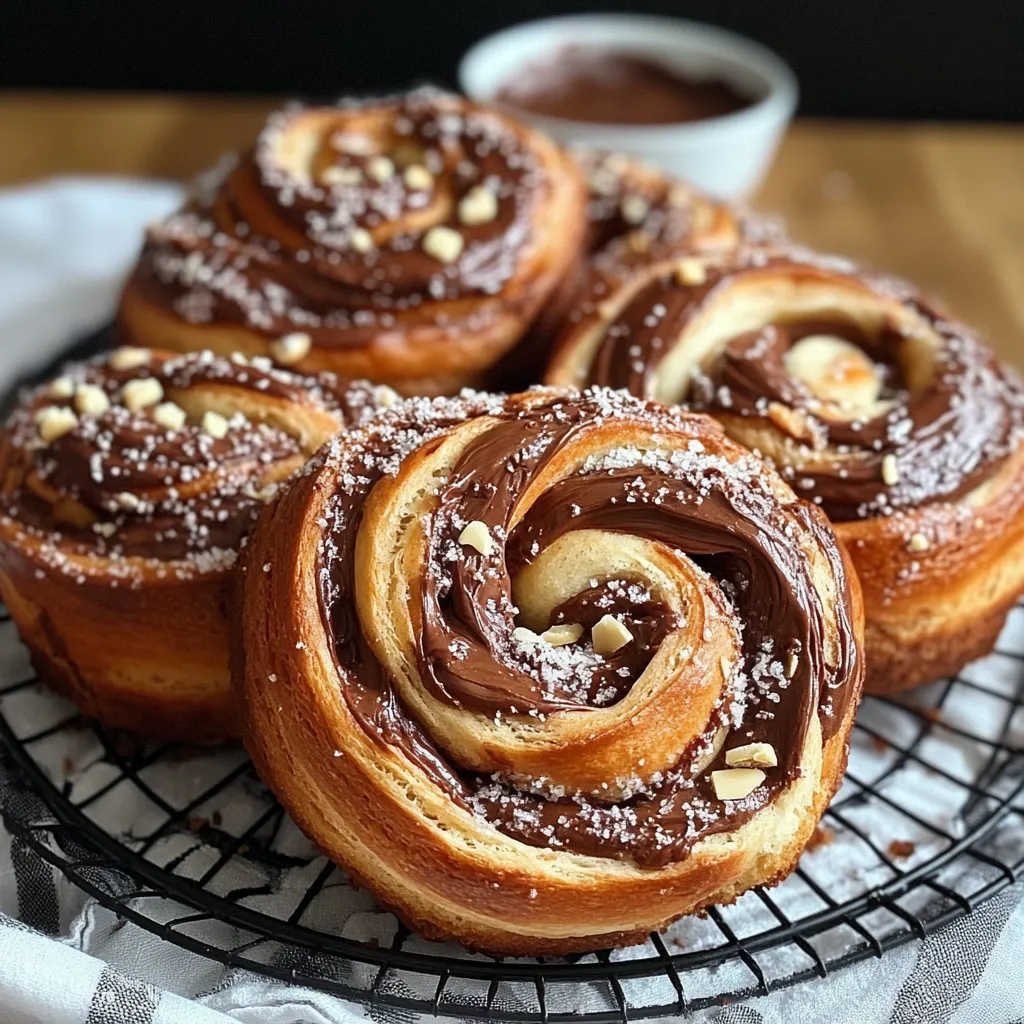
When you mix Nutella, crushed halva, and fluffy bread dough, you get an amazing breakfast treat. These babka buns perfectly balance light, fluffy dough with rich, nutty fillings. Each twist shows off layers of Nutella, pistachio halva, and melted chocolate bits, creating a fantastic mix of textures and flavors that'll wake up your taste buds.
Last weekend, these rolls stole the show at our family breakfast. The combo of Middle Eastern halva and Nutella sparked interesting chats about baking traditions from around the world.
Key Components
- Active Dry Yeast: New yeast packets work best for proper rising
- Room Temperature Butter: Should be soft but not melted
- Warm Milk: Between 110-115°F to wake up the yeast
- Pistachio Halva: Look for fresh halva that crumbles easily
- Quality Nutella: Make sure it's not cold for smooth spreading
- Vanilla Bean: Not required, but adds an extra fancy touch
After lots of testing, I've found that room temp ingredients and proper kneading are the secrets to getting the dough just right.
Step-by-Step Guide
- 1. Making Your Dough:
- Get your milk to the right warmth (110-115°F) – too hot kills yeast, too cool won't wake it up. Mix all your dry stuff first so the salt and sugar spread out evenly. Cut butter into small chunks so it mixes in better. After adding eggs, mix at medium speed for exactly 2 minutes – this helps develop the gluten. Keep kneading until you can stretch a small piece thin enough to see through without it breaking. For the first rise, be patient – wait until it doubles and leaves a slight dent when you poke it gently.
- 2. Getting the Filling Ready:
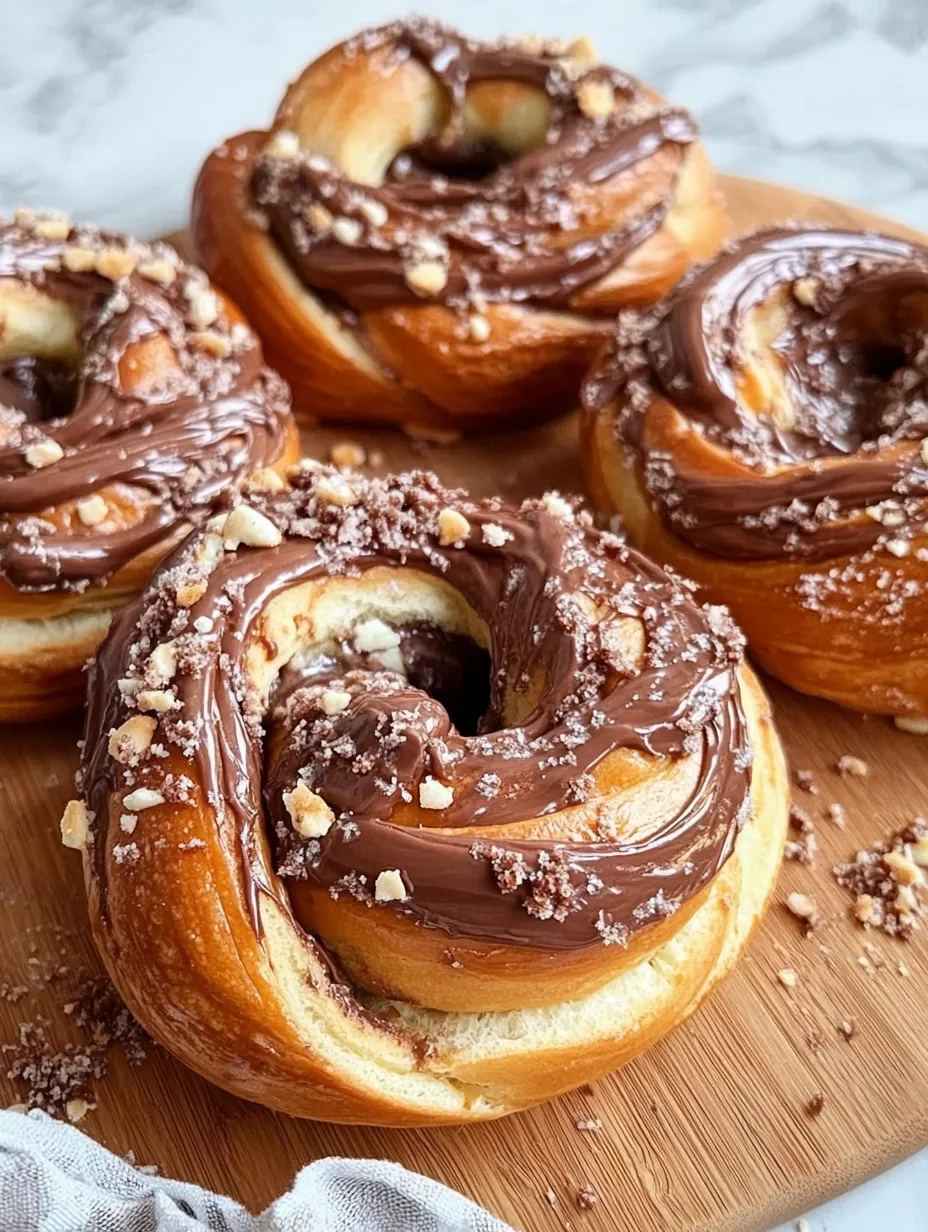
- Warm your Nutella slightly for easier spreading – about 10 seconds in the microwave usually does the trick. Break up the halva by hand for different-sized pieces. Don't crush it too fine or you'll lose the texture, but don't leave chunks too big or it won't spread well. Layer your fillings carefully – start with a thin layer of Nutella, then sprinkle halva and chocolate pieces evenly. Leave a border around the edges for sealing. Room temperature ingredients spread better and won't tear the dough. Balance is key – too much filling means messy rolls and uneven baking.
- 3. Shaping Your Rolls:
- Roll out your dough to even thickness – same thickness means same baking time. When cutting filled rolls lengthwise, use a sharp knife and cut in one smooth motion for clean edges. Twist with cut sides facing up to show off the swirly filling. When coiling, handle gently – too tight and it can't rise, too loose and it'll unravel while baking. Tuck the ends underneath securely. Place rolls with enough room between them for the second rise – at least 2 inches apart.
- 4. Baking Your Rolls:
- Heat your oven fully before baking. Put the rack in the middle for even heat. Look for golden-brown tops, but don't just trust your eyes – bottoms should be deep golden too. Test doneness by lifting a roll – the bottom should be firm and colored. Add sugar glaze while rolls are still hot so it soaks in better. Cool on a wire rack so bottoms don't get soggy.
- 5. Fixing Common Problems:
- If dough feels too sticky, add flour slowly – just one tablespoon at a time. If dough feels tough, let it rest for 10 minutes before kneading again. Filling leaking out usually means you used too much or didn't roll tight enough. Rolls unwinding during baking? You didn't tuck the ends well. Pale crust means your oven was too cool; too dark means it was too hot. Dough not rising? Check if your yeast is fresh and your milk was the right temperature.
- 6. Ways to Serve:
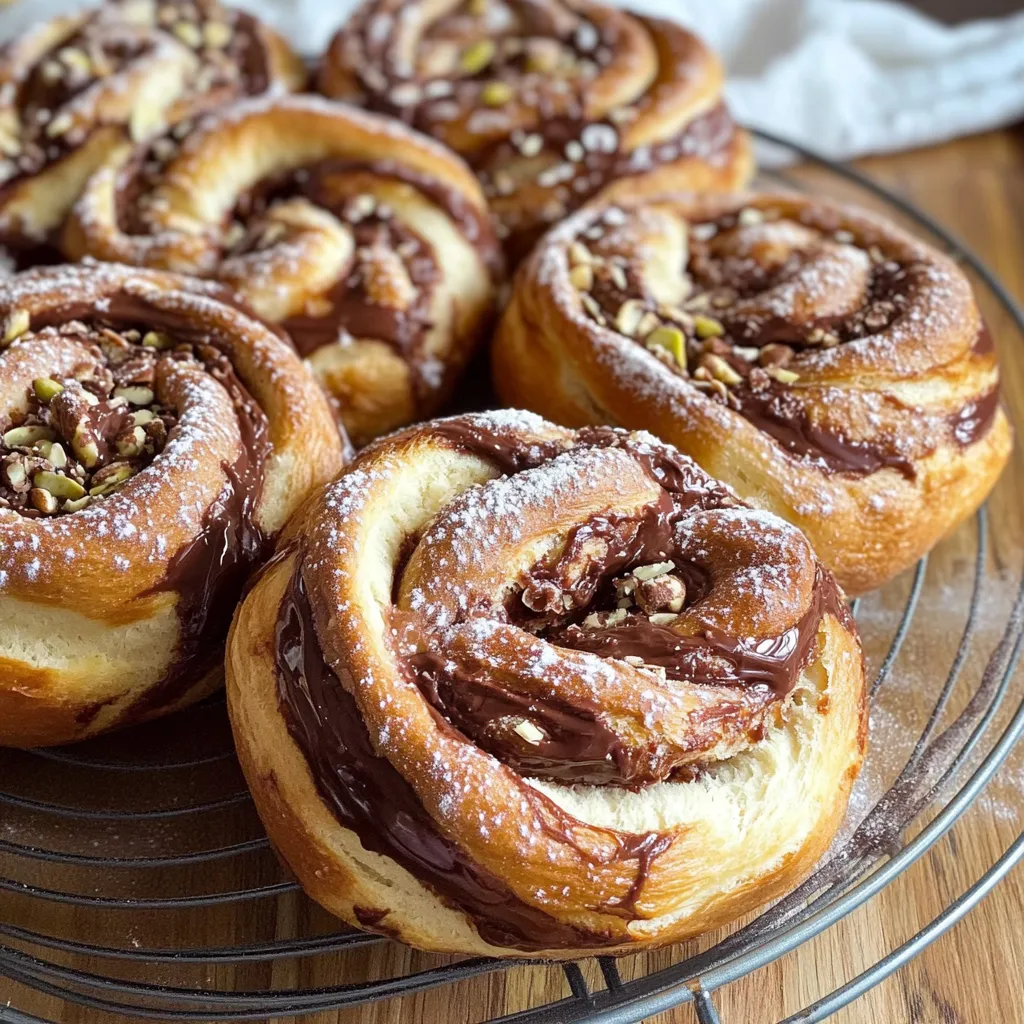
- Serve rolls slightly warm – a quick 10-second microwave brings back that fresh-baked feel. Pair with Turkish coffee or chai tea for a true Middle Eastern experience. For brunch, add fresh seasonal fruit and whipped cream. Make it fancy by dusting with powdered sugar and adding fresh mint sprigs. These rolls work great on a pastry board alongside seasonal fruits and nuts.
- 7. Keeping Them Fresh:
- Keep rolls at room temp in an airtight container for up to 3 days. For longer storage, freeze unglazed rolls for up to 3 months. Thaw in the fridge overnight, then warm before eating. If you plan to freeze, wait to add the sugar glaze until after reheating. Refresh day-old rolls by warming and brushing with melted butter. Store halva separately in a cool, dry place to keep its texture.
 Pin it
Personal Notes: These babka rolls really bring together Middle Eastern and European baking styles. Every time I make them, I remember my first taste of halva in a Jerusalem market. The balance of textures – fluffy dough, smooth Nutella, and crumbly halva – makes something truly special.
 Pin it
Great Ways to Enjoy
Show off these rolls on a wooden board or fancy tiered stand. For morning meetings, cut rolls in half vertically to display the pretty spiral pattern. Pair with:
- Fresh espresso or Arabic coffee
- Sweet whipped labneh with honey drizzle
- Fresh seasonal figs or berries
- Extra crumbled halva for decoration
Planning Ahead
Make your dough the night before and stick it in the fridge after the first rise. The slow fermentation actually makes it taste better. Shape your cold dough in the morning, giving it extra time for the second rise. They're best eaten the same day you bake them, but you can keep rolls in sealed containers for up to three days. Warm them quickly in a 350°F oven before serving.
 Pin it
These babka rolls have turned into my signature brunch item, mixing old techniques with new flavors. The recipe pays you back for your time and care with amazing results that always wow your guests.
Frequently Asked Questions
- → Can I prep the dough a day early?
- Sure thing, just put the dough in the fridge after it rises once. Let it warm up before you shape it.
- → What can I use if I can't get pistachio halva?
- Any halva works fine, or just toss in some crushed pistachios with extra chocolate bits instead.
- → Why am I needing to add more flour?
- Flour soaks up moisture differently depending on how humid or warm your kitchen is. Just add it bit by bit until your dough feels firm enough to work with.
- → Can I freeze these buns?
- Absolutely. Frozen baked buns last about 3 months. Just let them thaw overnight and warm them up before eating.
- → Do I really need the sugar glaze?
- The glaze just adds some shine and sweetness. Your buns will taste great with or without it.