 Pin it
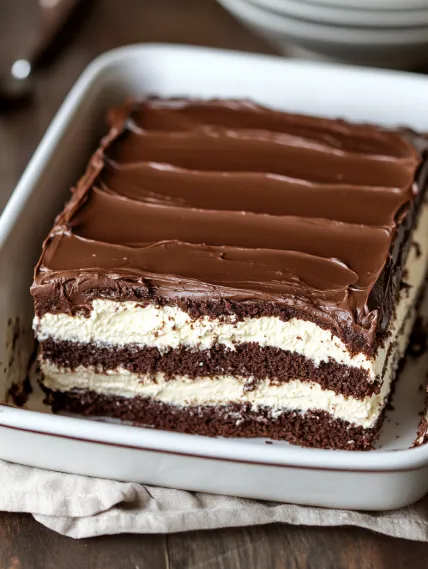
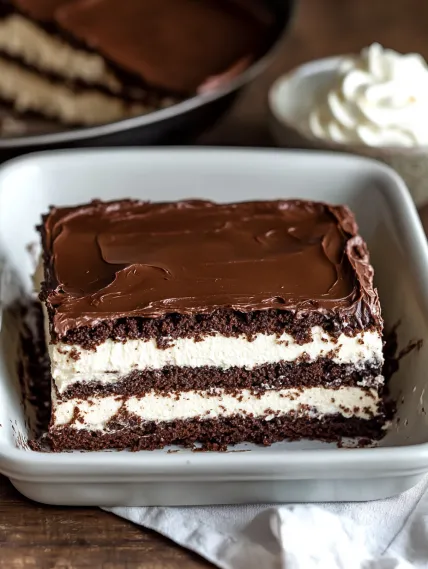
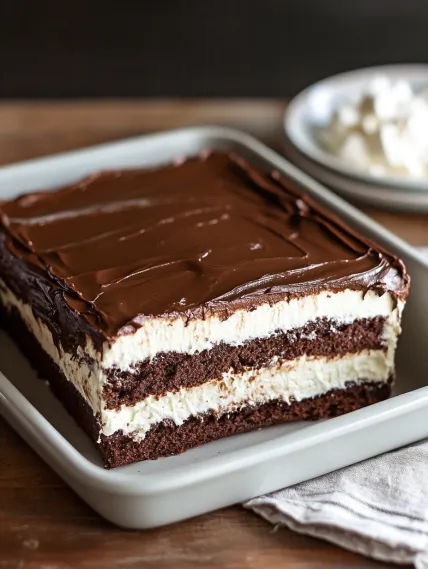
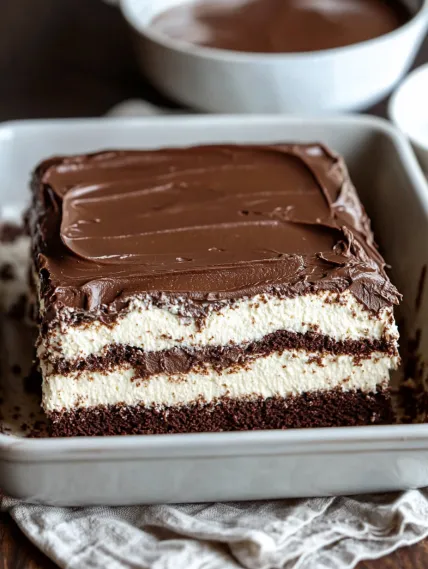
This mystical Italian Love Cake brings together smooth ricotta and decadent chocolate cake layers, finished with a luscious chocolate pudding topping. During baking, something wonderful happens - the ricotta mixture somehow drops beneath the chocolate cake, forming a delightful cheesecake-like foundation.
I whipped up this cake for my husband's birthday after hearing from his Italian grandma that he hadn't enjoyed this childhood favorite in forever. When he took his first taste, his expression was unforgettable - pure happiness mixed with sweet memories. Now it's our go-to celebration dessert, showing up at birthdays, anniversaries, and holiday meals.
Key Components and Smart Picking Advice
- Ricotta Cheese: Go for whole milk stuff for maximum creaminess. Fresh beats packaged, but both work fine. If it's too wet, drain it first.
- Devil's Food Cake Mix: Any box works great, though ones containing pudding make an extra soft cake.
- Instant Chocolate Pudding Mix: Stick with the regular kind instead of sugar-free for a better frosting texture.
- Whipped Topping: The stuff in tubs stays firm longer. You can swap in homemade whipped cream but it might not last as well.
- Vanilla Extract: Real extract beats imitation for bringing out the best flavor in your ricotta mixture.
I've learned that letting cold stuff warm up to room temp before mixing is super important for getting those layers to switch places during baking. Cold ricotta tends to stay put instead of doing that cool layer-swapping trick with the cake batter.
Step-by-Step Baking Guide
- Step 1: Mix Up the Ricotta Part
- Grab a big bowl and throw in 2 pounds of room temp ricotta cheese, 1 cup sugar, and 1 teaspoon real vanilla. Beat everything until it's nice and smooth. Add 4 large eggs one by one, mixing well after each. You want it silky with no lumps anywhere.
- Step 2: Whip Up the Chocolate Part
- In another bowl, mix your devil's food cake mix with 1 cup water, 1/2 cup vegetable oil, and 3 large eggs. Beat for 2 minutes till smooth. Pour this into a greased 9×13-inch pan, making sure it reaches all the corners.
- Step 3: Start the Layer Trick
- Now pour your ricotta mix over the chocolate batter, spreading it out evenly. Don't stress if it seems backward - as it bakes, they'll flip-flop with the cake moving up and the ricotta settling down to make a cheesecake-like bottom.
- Step 4: Bake it Slow
- Stick the pan in your oven at 350°F and let it bake for 60-70 minutes until the middle doesn't jiggle anymore. Don't open the oven for the first 45 minutes or your cake might sink. It's done when a toothpick comes out mostly clean.
- Step 5: Top it Off
- After the cake cools completely (an hour at room temp plus another hour in the fridge), make your frosting. Whisk a package of instant chocolate pudding with 1 cup cold milk for 2 minutes. Then fold in 8 ounces of thawed whipped topping until it's all mixed. Spread this fluffy stuff on your cool cake and chill at least 4 hours, but overnight is even better.
 Pin it
When I first tried making this, I worried so much about getting everything perfect. After a few wonky attempts, I realized that simple folds work just as well as fancy ones - it'll taste amazing either way. Now my kids join in with the folding, each creating their own style that's become part of how we celebrate together.
Achieving That Wonderful Feel
What makes these cookies special is how they combine different textures - crunchy bottoms with soft, tasty fillings. I've figured out it's all about handling moisture. You need to really squeeze that salted cabbage to get the water out or your filling gets mushy. The cornstarch helps bind everything and soaks up extra moisture too. And the cooking method - fry, then steam, then fry again - gives you that awesome crispy bottom while making sure the filling cooks through just right.
 Pin it
Party Prep That Makes You Look Good
This recipe is so great for entertaining because you can do it ahead of time. When I'm hosting, I often work in stages: shape and freeze the balls up to a month early, bread them the day before and keep them covered in the fridge, then just bake before everyone shows up. The smell fills the house and gets everyone excited to eat. For bigger groups, I make twice as much and keep the second batch warm in a low oven until we need it.
New Meals From Leftovers
If you actually have any cookies left (which hardly ever happens at my place!), you can turn them into completely different dishes. Mix crumbled cookies into scrambled eggs for a French-style breakfast, or cut them up and toss them in a green salad with spicy dressing for lunch. My favorite trick is putting halved cookies on top of creamy grits for breakfast - it's so good and carries the flavors into your morning.
 Pin it
Smart Cooking Tricks
- Let those balls sit about 5 minutes after they come out of the oven – they'll get the perfect texture inside
- Want more flavor? Try adding a teaspoon of smoked paprika to your panko mix
- Can't find cookies nearby? You can order them online from places like Bourgeois Meat Market or The Best Stop
- Set out several dipping sauces – maybe spicy remoulade and cool ranch along with Louisiana sauce
- For a pretty display, arrange your balls with bits of chopped parsley, purple cabbage, and yellow bell pepper to show green, purple, and gold colors
Frequently Asked Questions
- → Why do the batter layers flip while baking?
- It's all about how dense each mix is. The chocolate batter is heavier, so it drops to the bottom as it bakes, while the lighter ricotta floats upward. The eggs in the ricotta mix help it rise and set, giving those signature layers everyone loves.
- → Can low-fat ricotta work instead of whole milk ricotta?
- Low-fat ricotta can work, but it won’t give the same richness. Avoid fat-free versions; they might mess up texture and the layer-flipping process. Drain any extra liquid beforehand for the best result.
- → Why does this dessert need hours in the fridge?
- Chilling lets the ricotta layer firm up perfectly and gives time for the flavors to blend fully. Kind of like cheesecake or tiramisu—it’s worth the wait for that smooth, flavorful texture.
- → Can I store this dessert in the freezer?
- Yep, it freezes wonderfully! Slice, wrap each piece in plastic and foil, or pop them into freezer bags. Keep for up to 2 months. Just thaw overnight in the fridge. The frosting may change a bit, but it’ll still taste great.
- → What if I don’t have instant pudding?
- No pudding mix? No problem! Make ganache instead: pour warm cream over chopped chocolate, stir til smooth, cool a bit, and spread it. Or stick to basics with a quick chocolate buttercream.
- → How do I tell if the dessert is fully baked?
- The middle might look soft and jiggly because of the ricotta topping. Check the edges—they should pull away slightly from the pan. A toothpick jabbed in should come out with crumbs, not goo. If the top browns too fast, loosely cover with foil and keep on baking.
